
You own a hosting at WPScale, and you want to migrate your WordPress there !
Don't panic, there's Duplicator !
There’s also Migrate Guru, more secure and easier to use, just go to the following documentation => https://www.wpscale.com/docs/your-first-steps-with-wpscale/moving-your-wordpress-site/.
Its name sounds like a superhero, and that's not untrue. :-)
With this tutorial, you’ll see that you can migrate your site in a few minutes with amazing ease !
We’ll use the Duplicator tool which really is the ideal tool for all your WordPress migrations !
What’s more, it’s free, so it would be a shame to be without it, wouldn't it ? ;-)
So let's go - I'll explain everything step by step ! ;-)
Step 1: Create your WordPress from your console with us.
Log in to your account and click on the Login button on your console: https://www.wpscale.com/my-account/.
You can then create your WordPress in the following way after logging in:
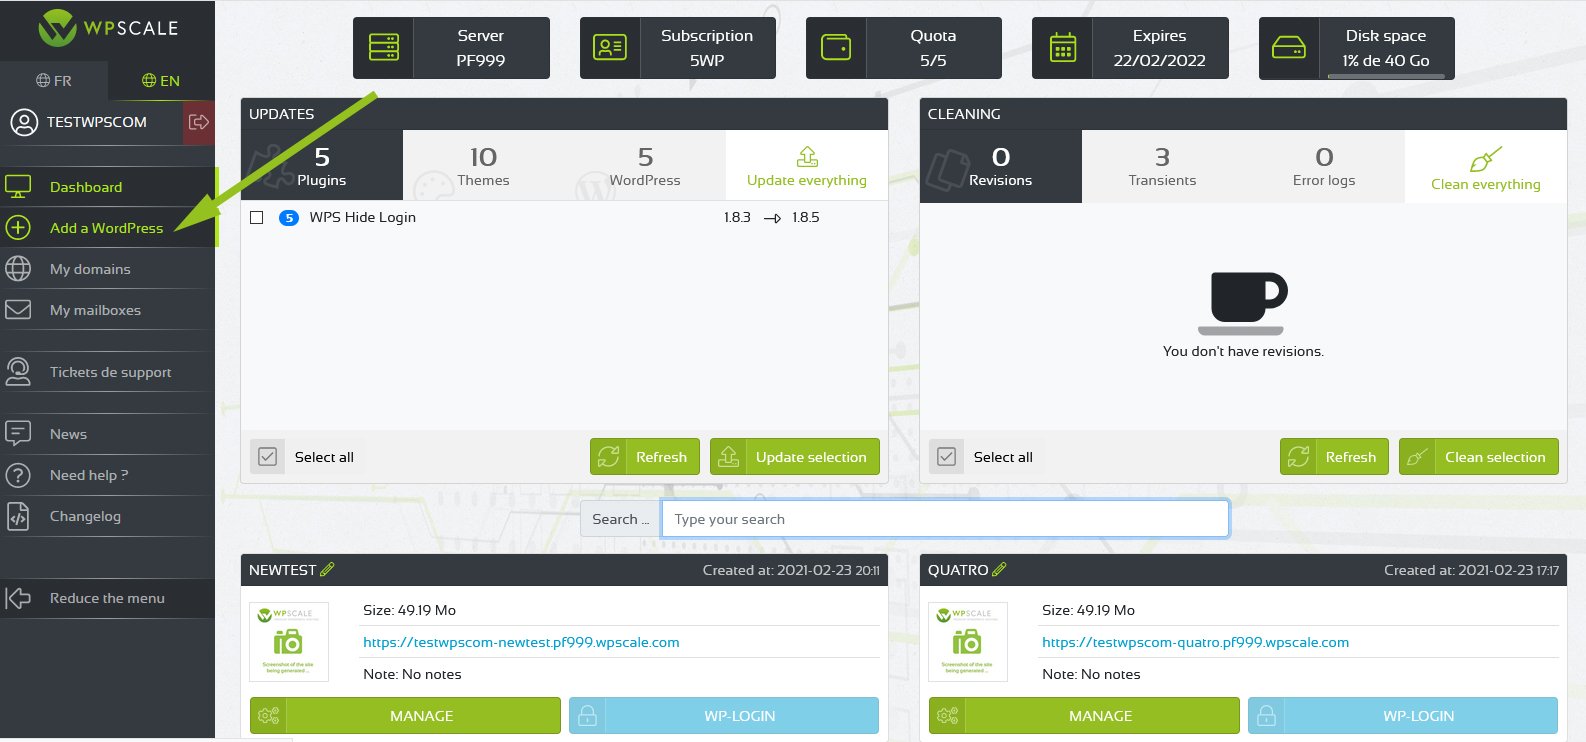
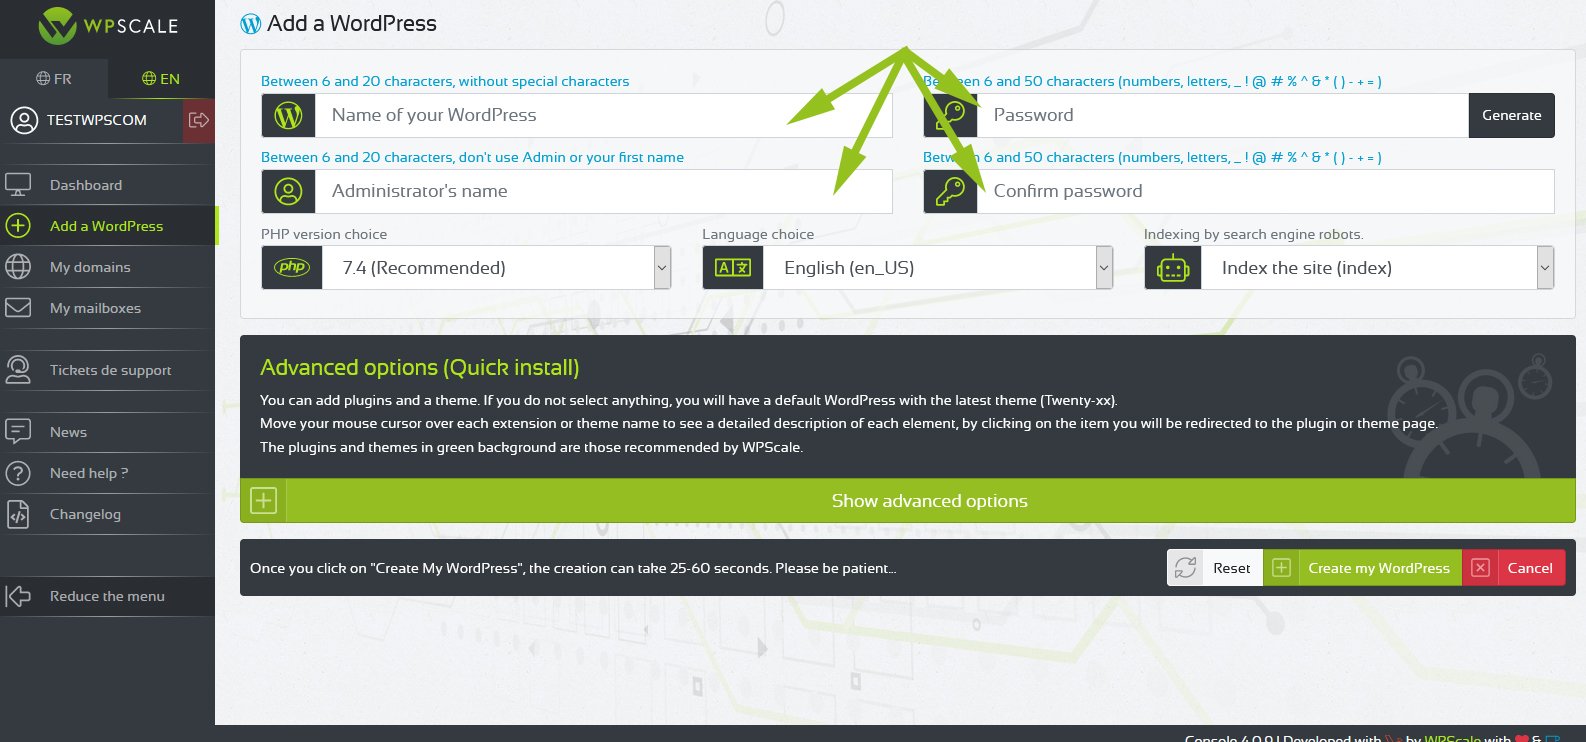
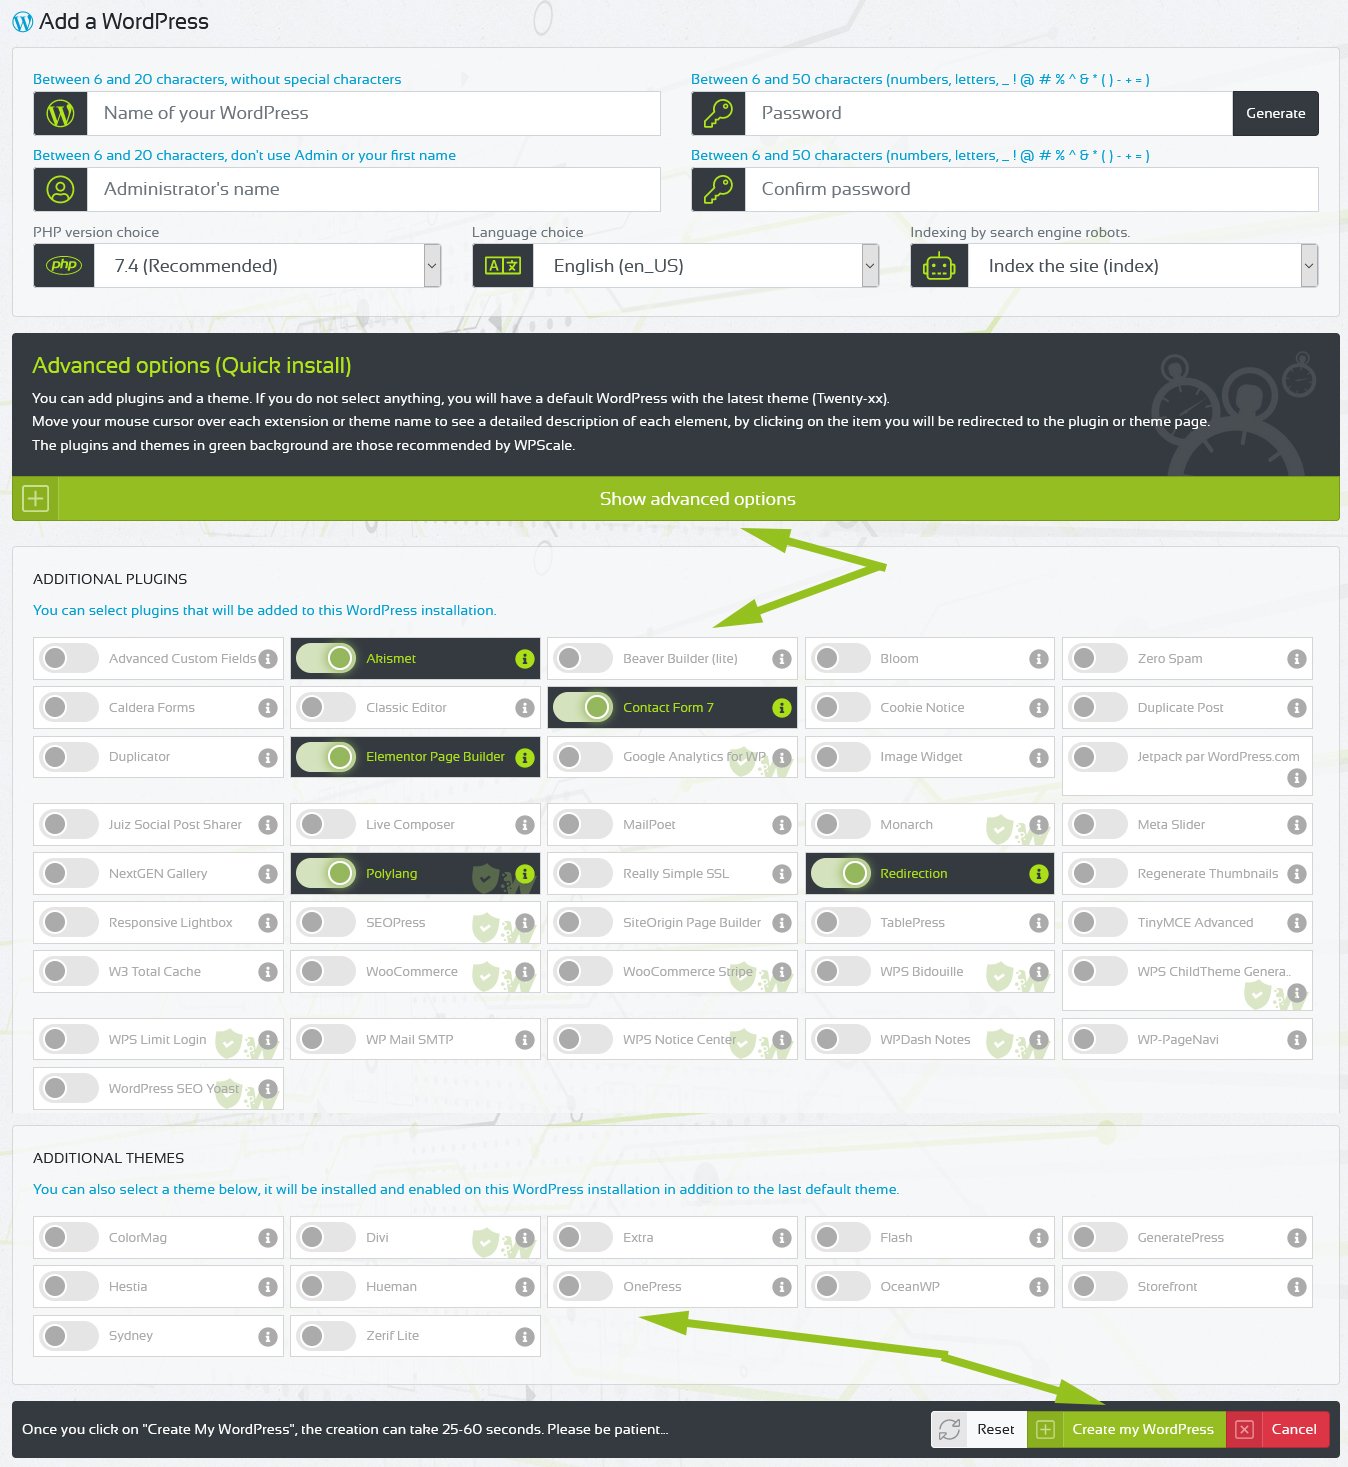
Once your WordPress has been created, you’ll receive by email all the login information (Administration connection, FTP, PhpMyAdmin). Write them down as you’ll need them later !
Step 2: Go back to the administration of your WordPress to migrate
We're going to install Duplicator :-)
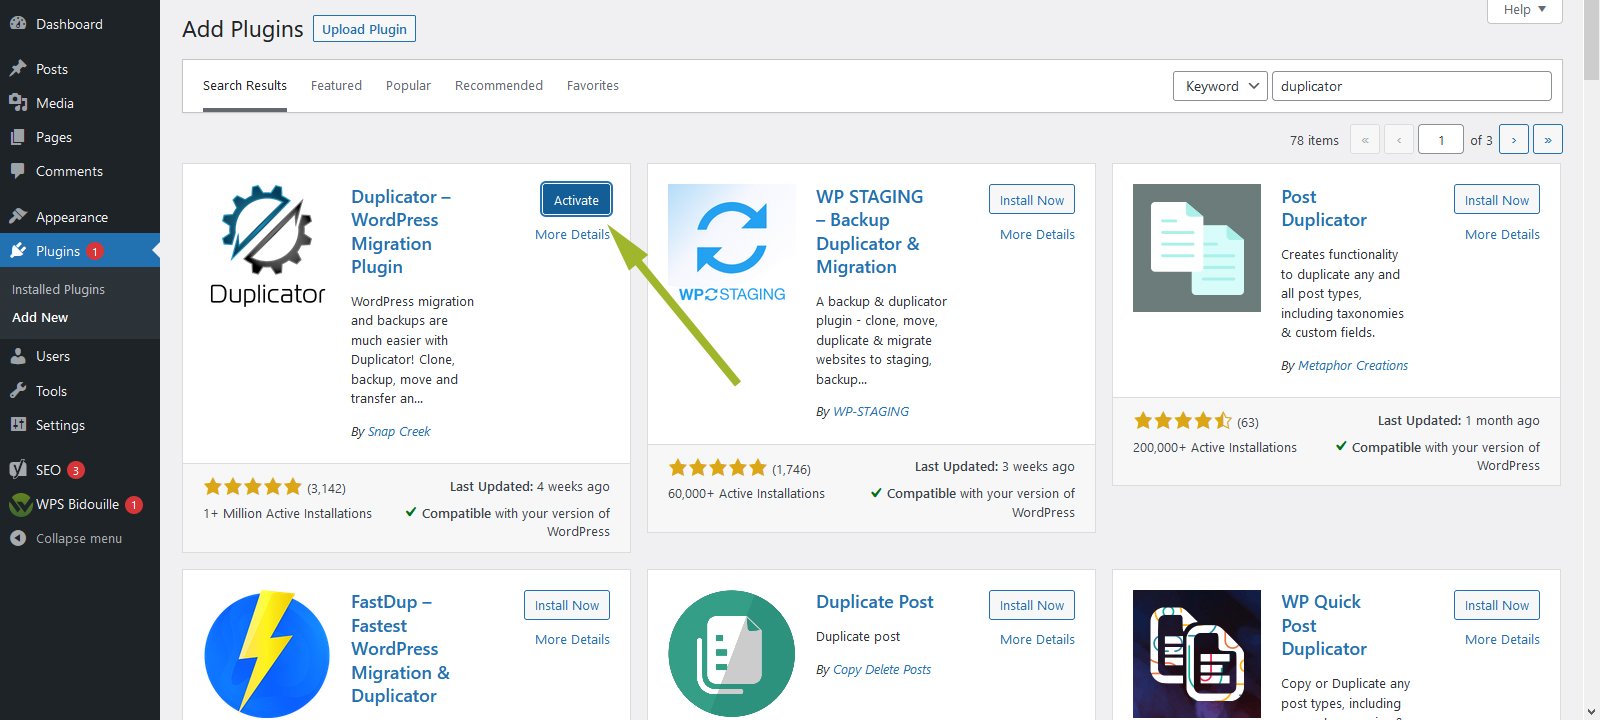
Once you’re logged into the administration of your WordPress site to be migrated, go to the plugins to install Duplicator, and follow the steps described in the following images.
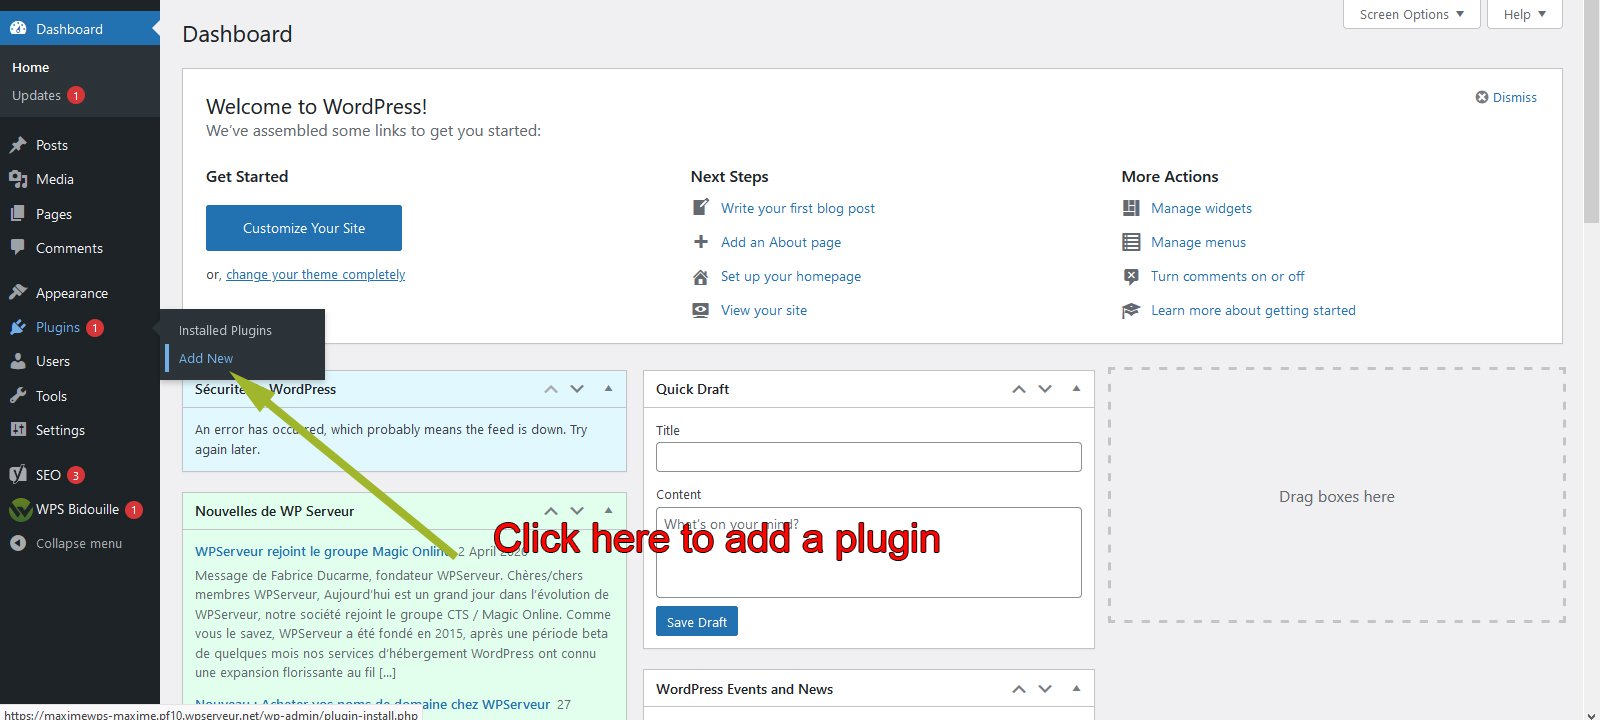
Then search and install Duplicator:

All you have to do is activating it to start using it !
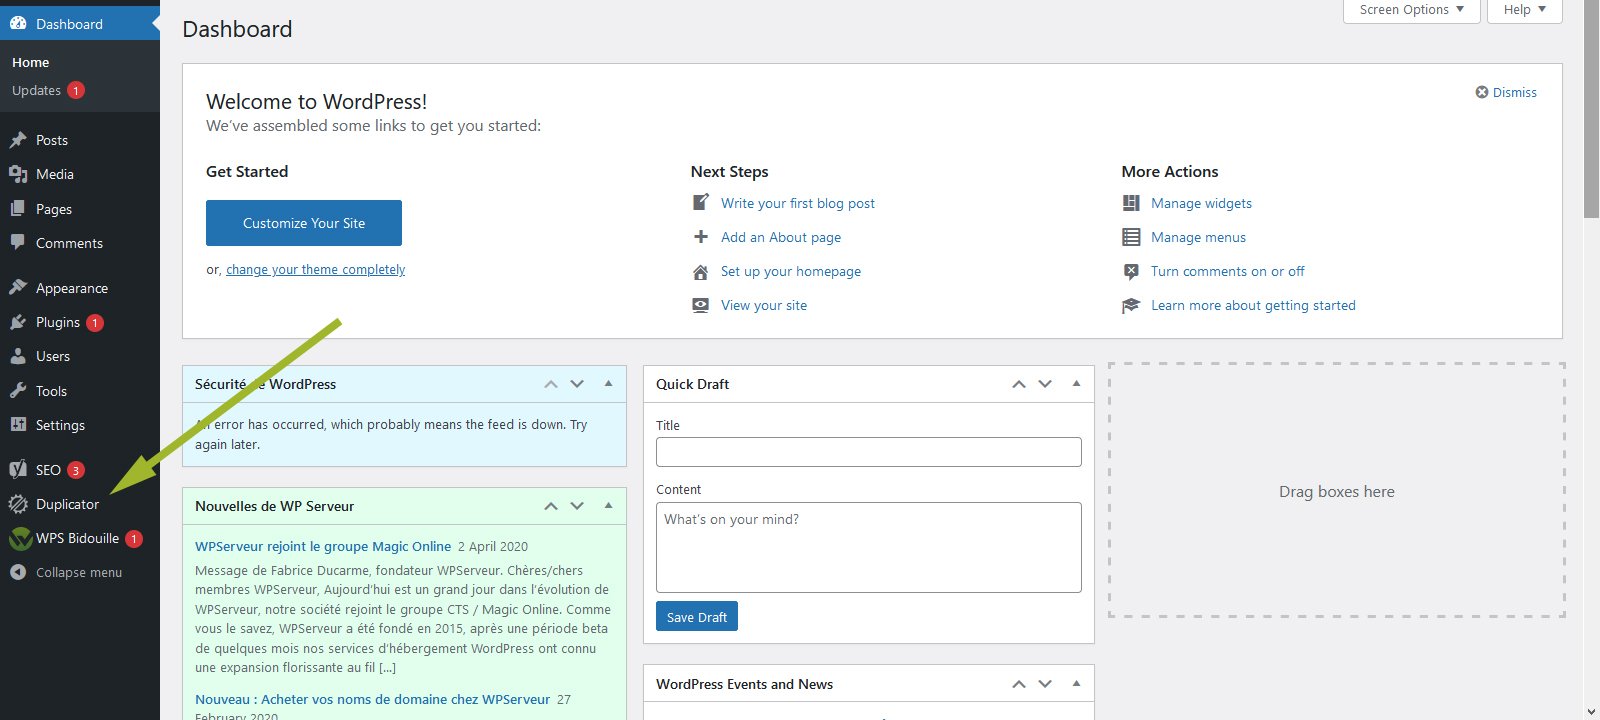
Now that you've installed and activated Duplicator, you're going to have to set it up !
Don't worry - nothing complicated here :-)
If you use a cache plugin (W3TotalCache, WP-Rocket or other), we recommend you disable it before proceeding to the next step, to avoid any errors on your site after migration.
Step 3: Setting up Duplicator correctly
A simple formality ;-)
Launch Duplicator to start using it.
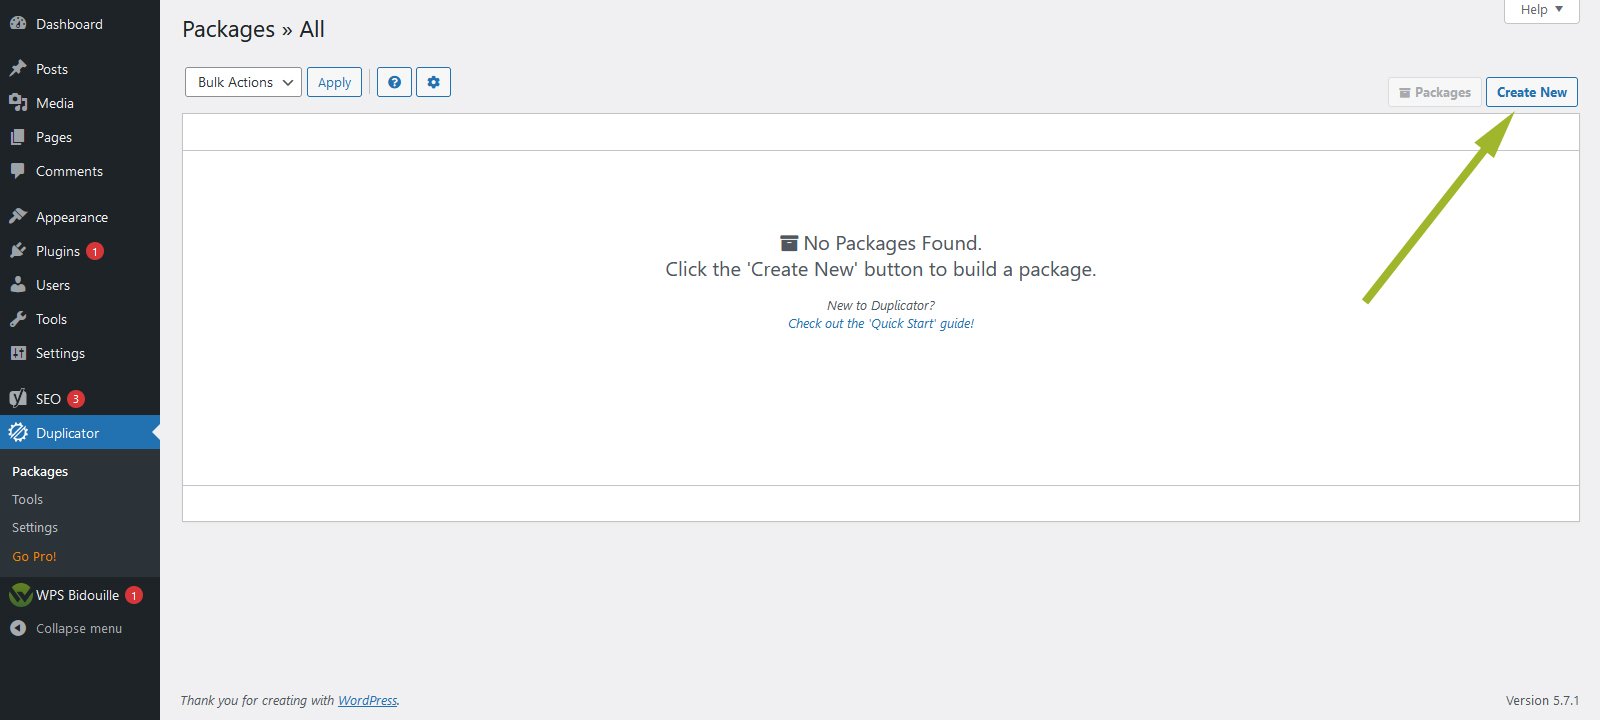
Create your first package.
That's where it gets complicated ... or not :-)
Follow the directions in the image and proceed to the next step.

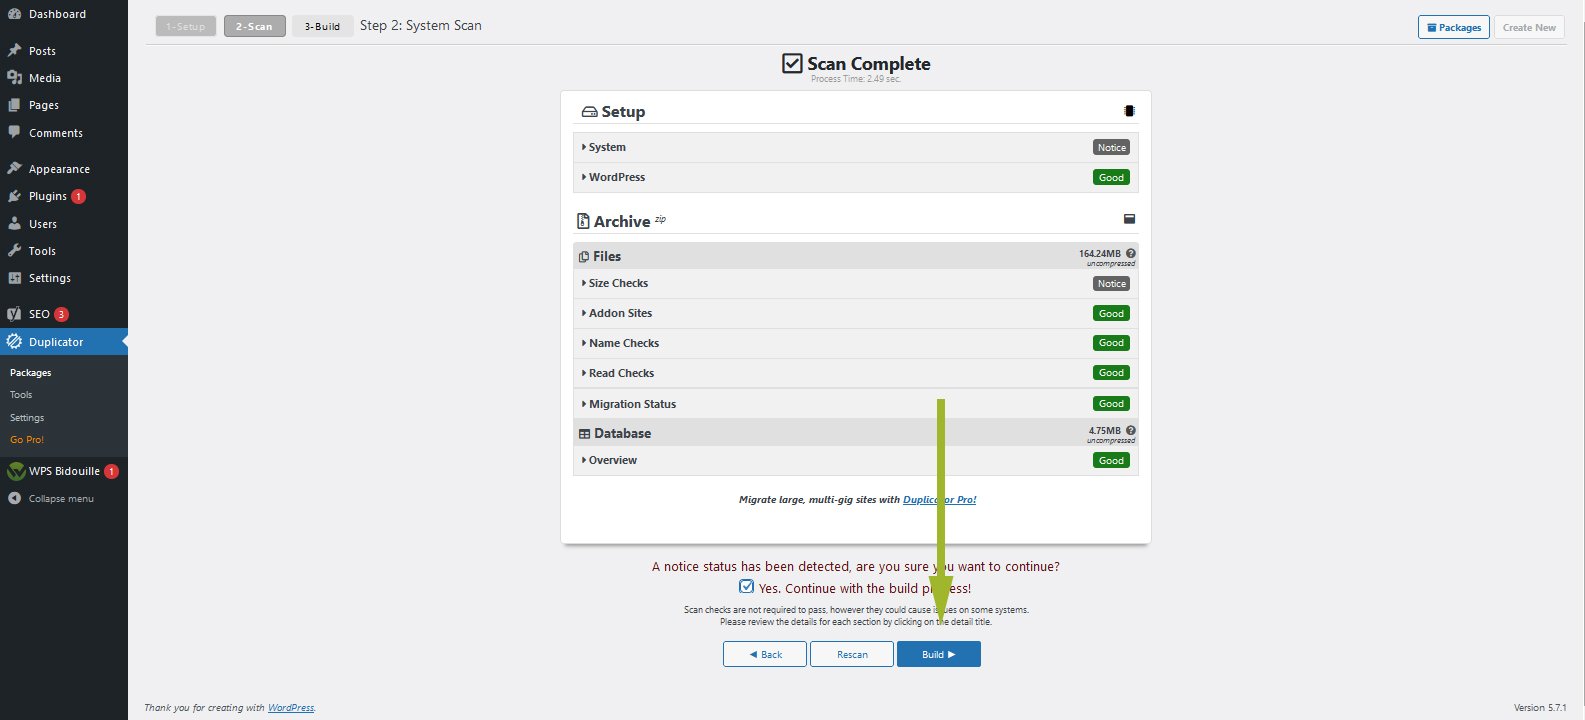
A scan will then be performed to check that everything is OK - you shouldn’t have any errors.
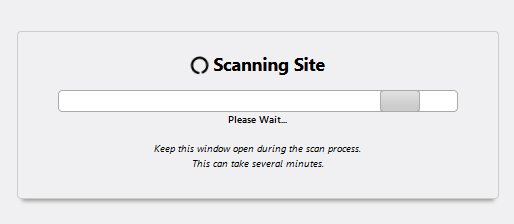
Now here's what you should see as soon as the scan is complete.
If you have the same error as in this preview, you can ignore it.
Otherwise, if you have other errors, please contact our support and provide us with a screenshot so that we can help you ;-)
Now here's what you should see as soon as the scan is complete.
If you have the same error as in this preview, you can ignore it.
Otherwise, if you have other errors, please contact our support and provide us with a screenshot so that we can help you ;-)
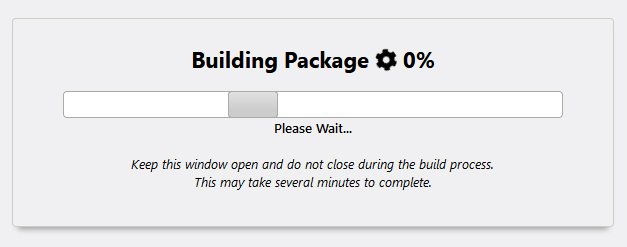
You can click on the blue Create button to continue.
And once the assembly is complete, you’ll see a page like this one.
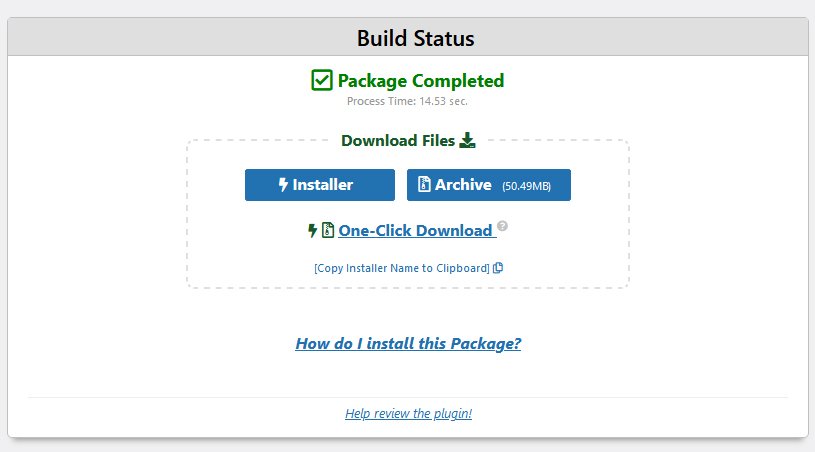
You now have an installer and an archive. These two files are necessary to launch the migration of your WordPress with us :-)
You must therefore download these two files, simply by clicking on these two blue buttons.
So now we can move on to the next step !
Step 4: Modifying your DNS
A short but necessary step :-)
To avoid any problems with your domain name, you should now point your domain name to our servers.
Nothing could be simpler. I invite you to read our article all about this step: https://www.wpscale.com/docs/your-first-steps-with-wpscale/dns-change/.
Step 5: Migration to WPScale
Chin up, it's almost done :-)
It's time to go back to your WPScale console and log in to your PhpMyAdmin by clicking on the PhpMyAdmin button.
You can also access your PhpMyAdmin by going to [display-mysql-console].
And this is where you need to go back to the email we sent you when you created your WordPress - you’ll find the login details to connect to PhpMyAdmin.
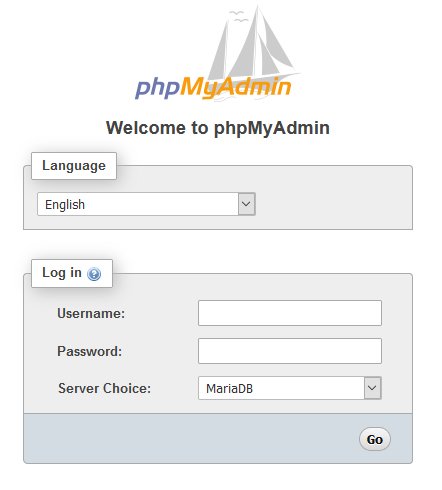
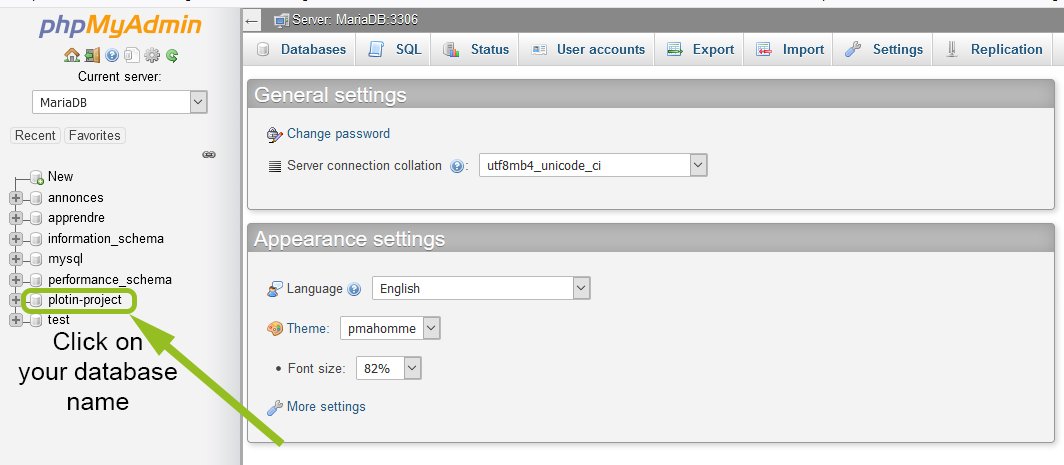

There you go - you're finished with the PhpMyAdmin ;-)
Return to your WPScale console and click the FTP button to get the FTP login information.
You can find all the FTP login information in the email we sent you when creating your WordPress.
So you’ll need an FTP client - I advise Filezilla, as it's the best FTP client available, and it's free !
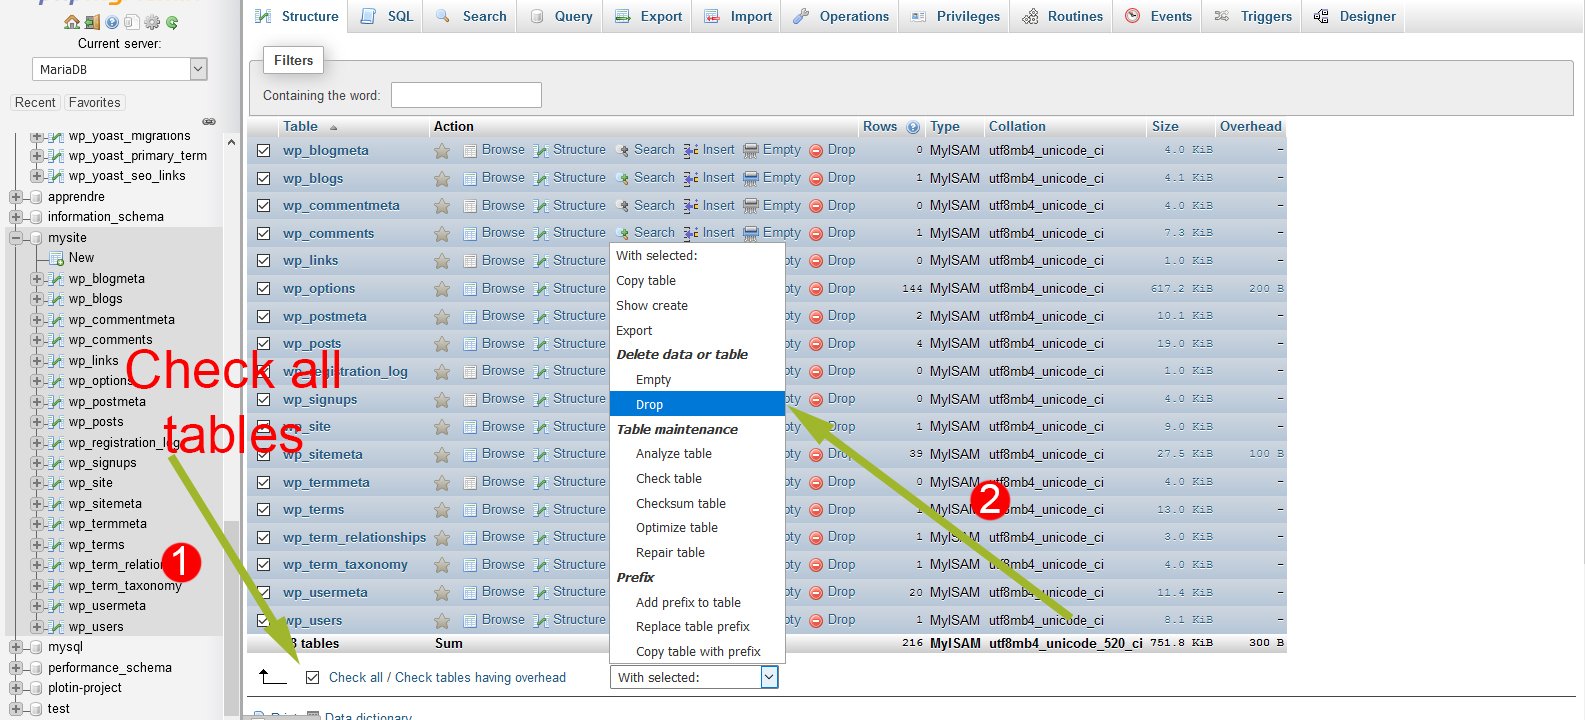
Once downloaded and installed, log in with your details and delete files and folders.
Be careful - you must delete everything, except the file wp-config.php.
You need to rename it to wp-config.php.old and keep it in your FTP.
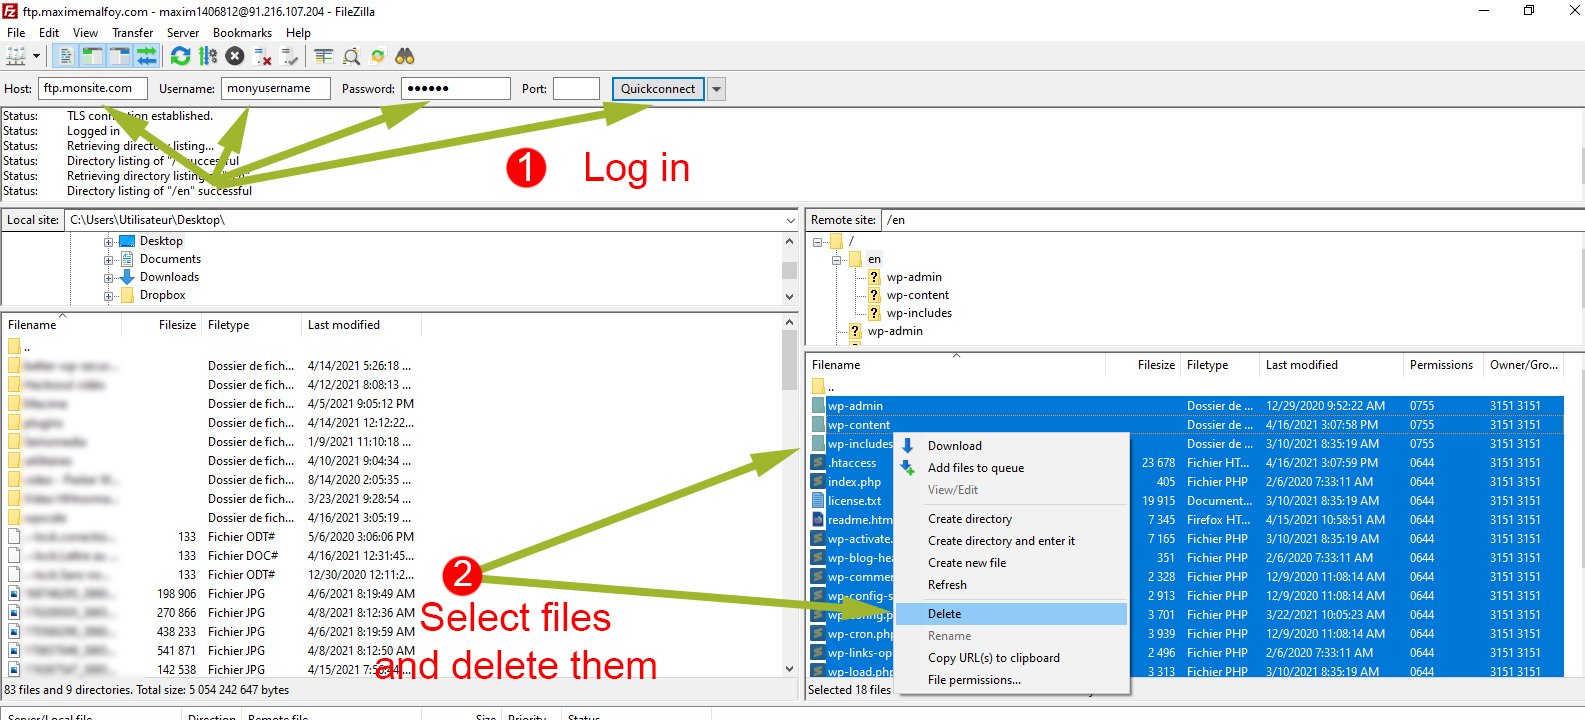
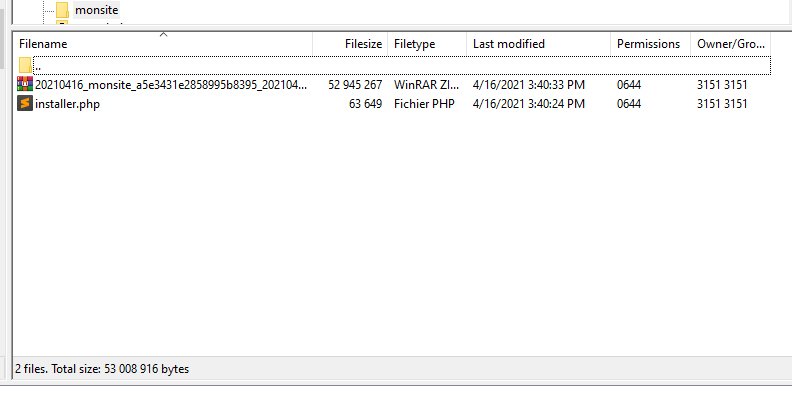
We’ll have to run the script that allows us to install your site with Duplicator. You then have to send the archive and installer that you recently registered to your FTP using Filezilla.
There you go - you’re now in the last stage of your migration ! :-)
Final stage !
Another 2-3 clicks and it’s done !
Now the installer is in place, you have to run it in your browser. For this, you can find the link for your site in the email for creating your WordPress.
As soon as you’re on the page of your site, go to the address bar and add "installer.php" to the URL, so that the URL looks like this: http://votredomaine.com/installer.php.
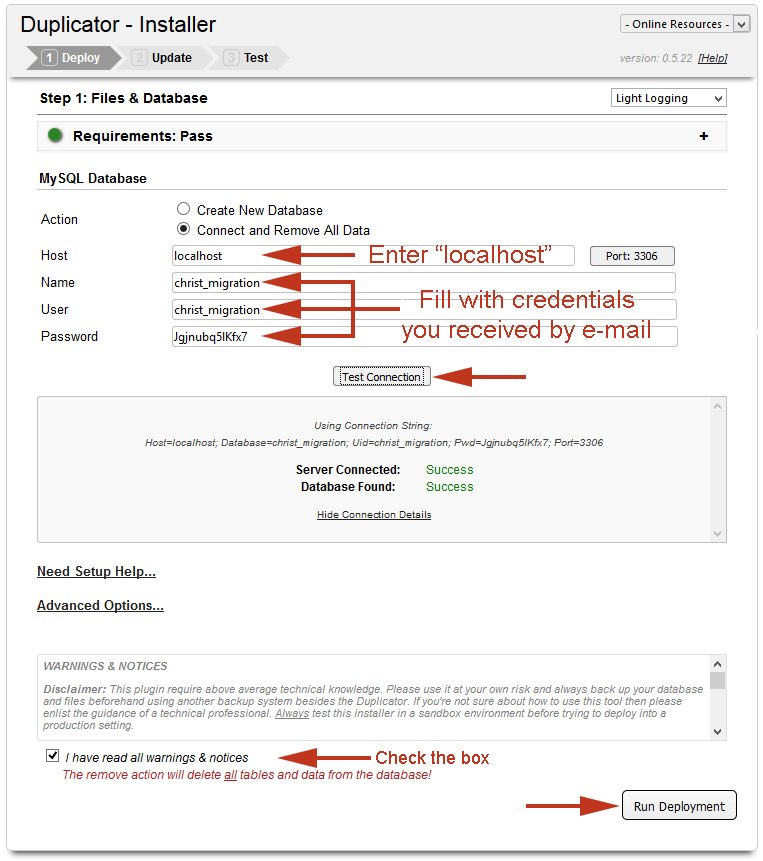
You should come across a page like the one below, then you should follow the directions and go to the next step.
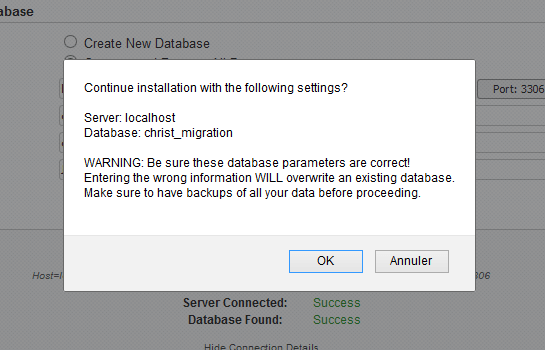
Click OK in the dialog box that opens.
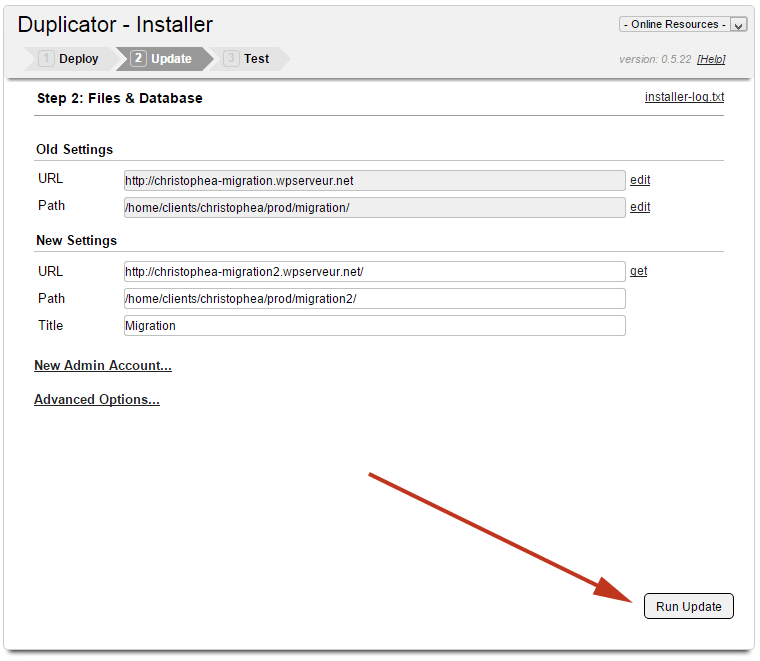
Then, the settings should be correct, so you can click on the "Run Update" button.
There you have it ! :-)
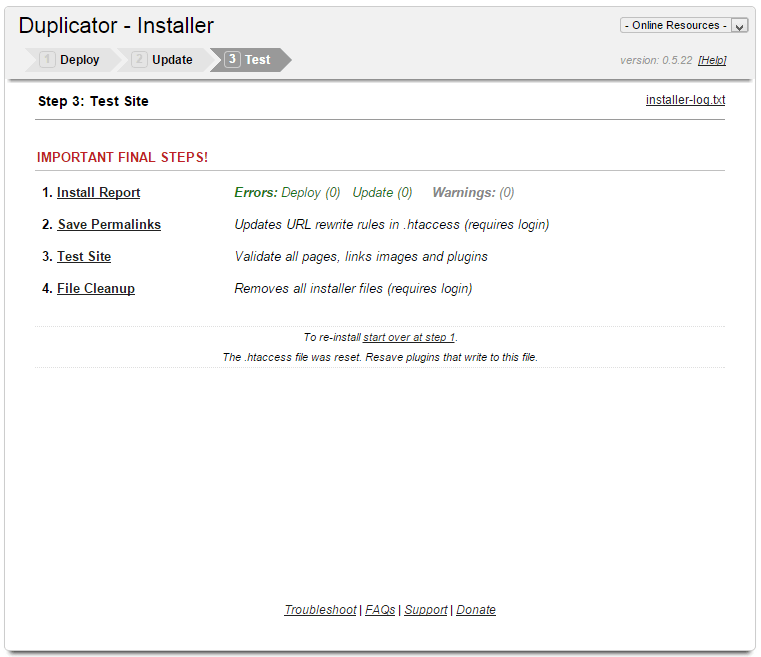
If you see the next page, it means that everything went well and your migration is complete !
Well done :-)
You can now go to your new migrated WordPress to test that everything is working properly.
Now that your WordPress is with us, we invite you to install our MU-Plugins, which add extra security to your WordPress.
You’ll find all the information on this page: https://www.wpscale.com/docs/hosting/useful-plugins-scripts-mu-plugins/.
Please note that the address of your administration will then be http://yourdomain.com/login/ (change "yourdomain.com" to your domain name). Don't forget now to delete the installer.php file and the archive, and everything will be fine ! :-)