
Local by Flywheel lets you create your WordPress site on your computer without technical knowledge by replacing software like WAMP, MAMP or XAMP. This software, available on Windows, macOsx and Linux, simplifies the management of your projects, from the creation of WordPress sites to validation and production in a local environment with PHP and MySql, each site benefitting from a virtual webmail and even an SSL certificate.
The WordPress project management with Local by Flywheel allows beginners to become familiar with the tool and prepare their site easily, without risk and free of charge. The configuration is fully automated, and the database is automatically created for your project. Only the WordPress name, login and password are requested on creation. You can even choose the PHP environment corresponding to your hosting (Apache or NGINX). In a few clicks, your site is ready.
Natively, Local by Flywheel doesn’t let you migrate your project locally in one click to your hosting. This tutorial lets you simply set up the migration procedure to WPScale. Fast and accessible to all, this method is only valid for moving your WordPress to WPScale, with the Migrate Guru plugin.
Creating a WordPress on your WPScale hosting
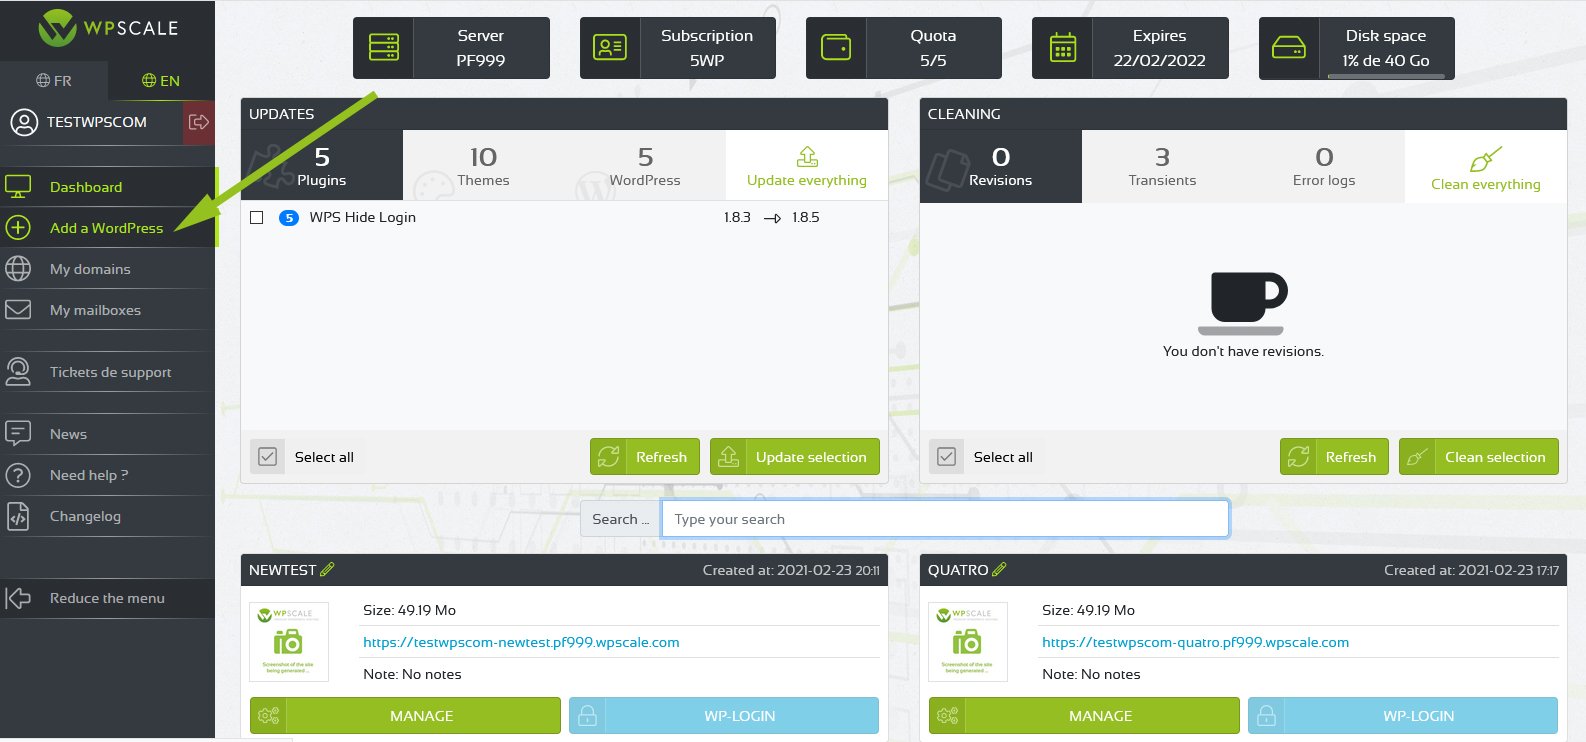
The first operation is to add a WordPress from your WPScale console. This step is essential in carrying out your migration.
Adding WordPress will allow:
- copying WordPress files
- creation and implementation of the FTP space
- database creation
- creation of your user
Go to your console and click on "Add a WordPress":
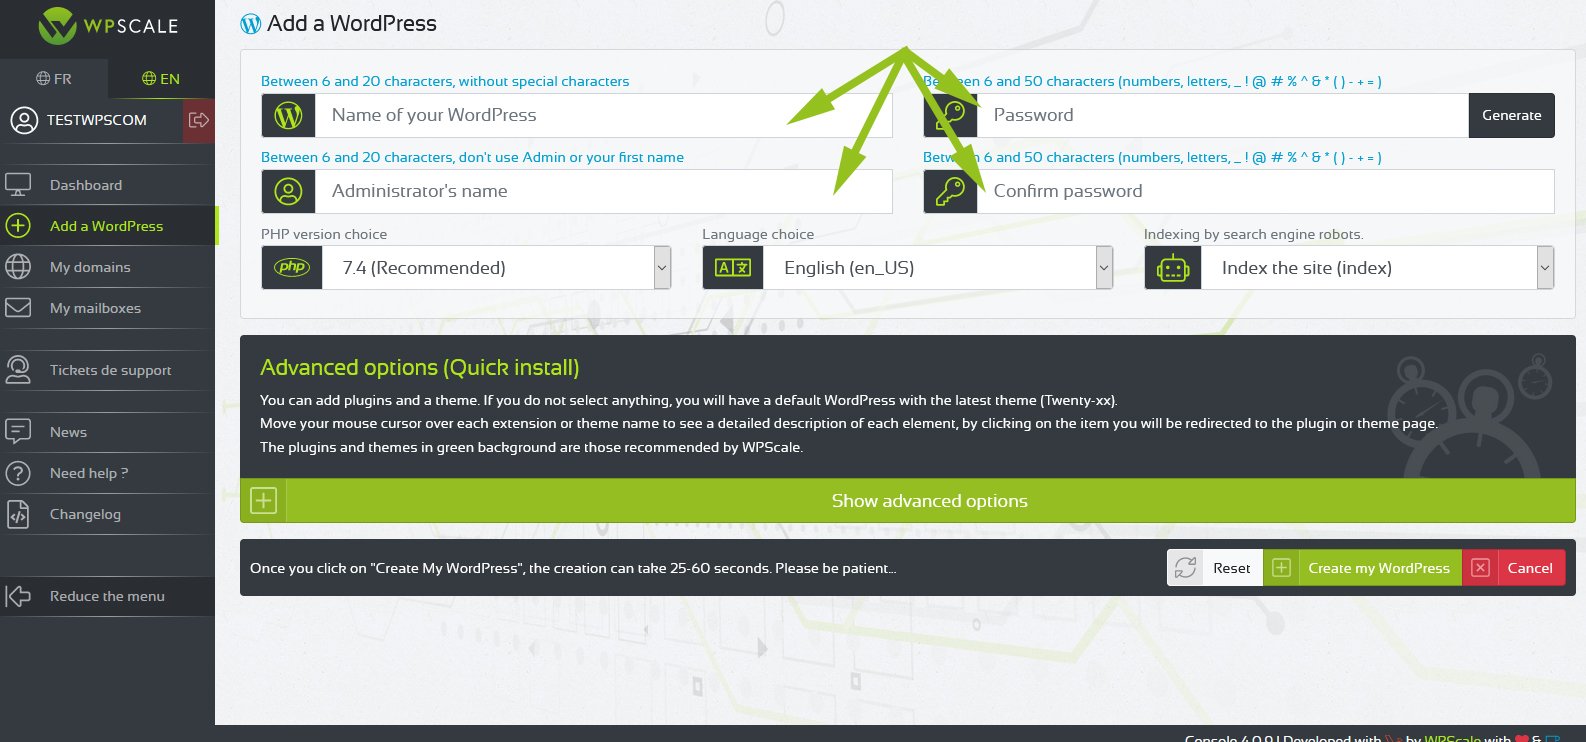
On the next page, you can create a simple WordPress. Only the WordPress creation information is required - you don't need to add plugins or a theme in the "Quick install" options. The password chosen will be the one to be used later for FTP access.
Once the settings of your new WordPress have been validated, the creation process takes between 25 and 35 seconds. A success message appears and informs you that the operation has been carried out correctly. You then receive an email with all the information about this WordPress (URL, login URL, Password, FTP codes, PhpMyAdmin…). When WordPress is created, the page reloads and the new WordPress installation is added to the list of your sites on the home page of the WPScale console.
View your site "Live"
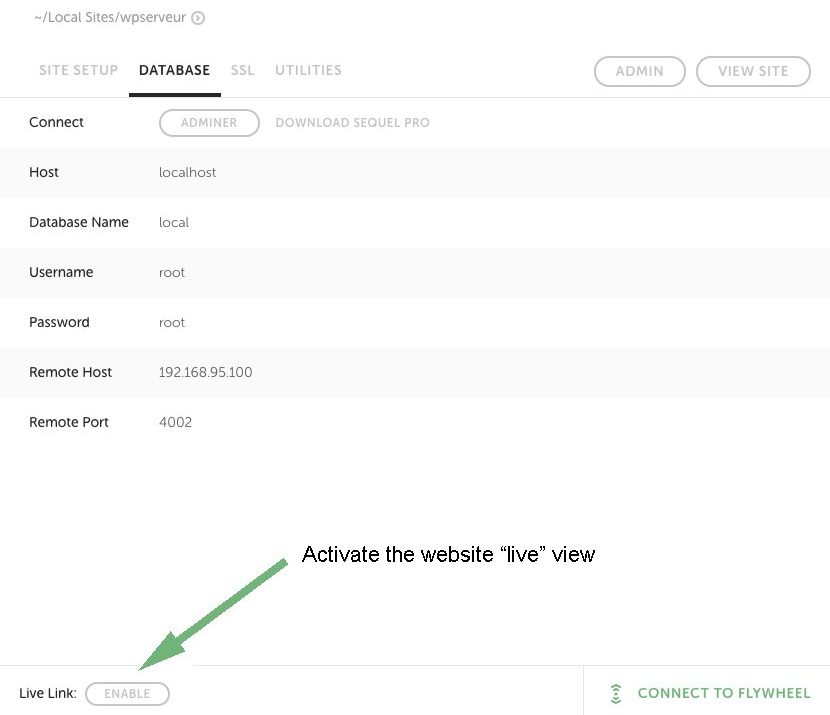
Local by Flywheel's "Live link" feature lets you view the site directly as if it were already migrated.
Note that the speed of the site may appear slow. This is due to the fact that the data is retrieved from your computer. If this doesn’t work, check your firewall settings and allow external access momentarily.

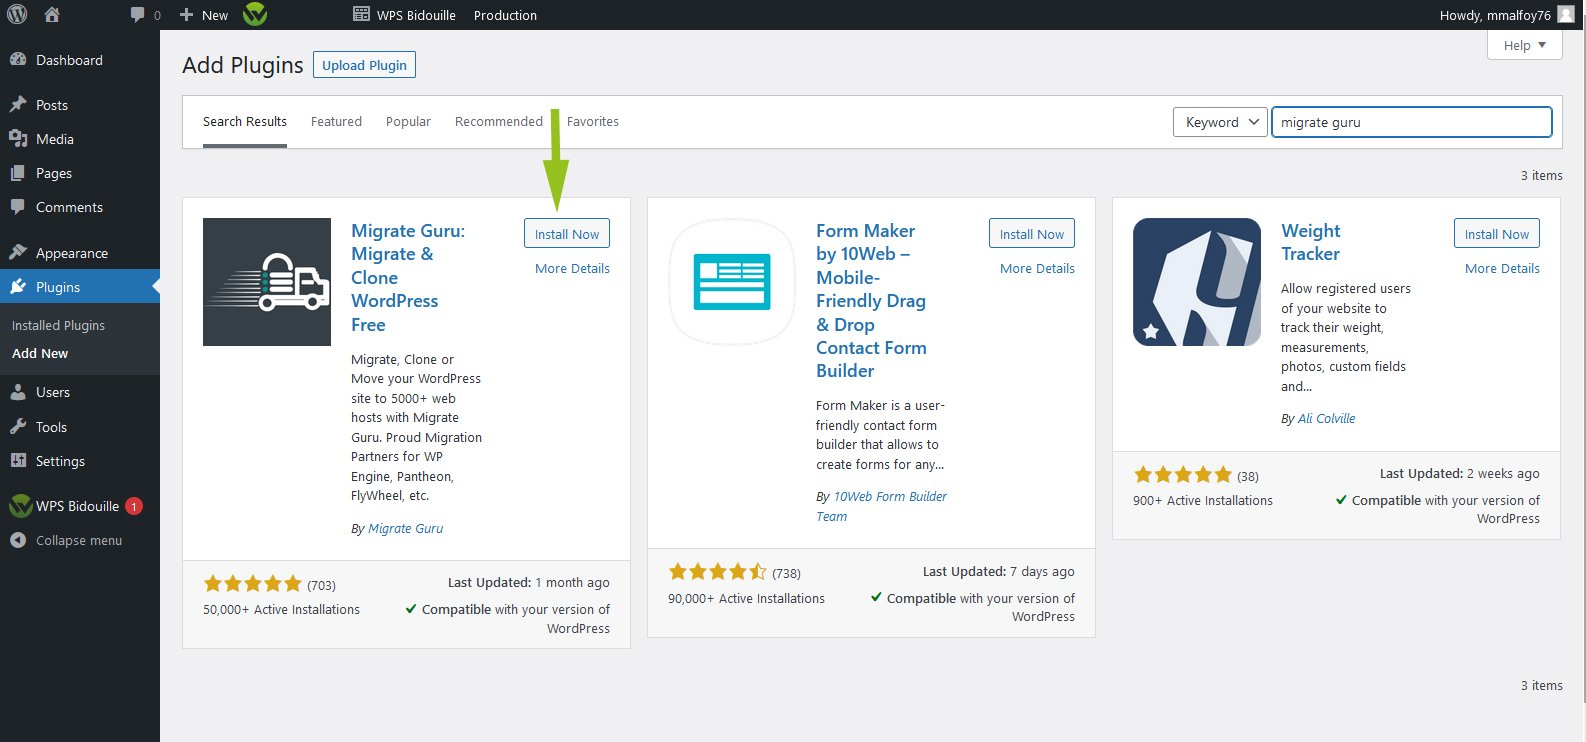
Once the feature is activated, you can go directly to the administration of your WordPress. On the plugins page, add and activate the Migrate Guru plugin.
Configure migration
The information necessary for the migration is available from the WPScale console in the "WordPress" >> "FTP Production" tab of the WPScale console. The FTP password was sent by email when WordPress was created. If you’ve lost it, you can change it from your WPScale console.
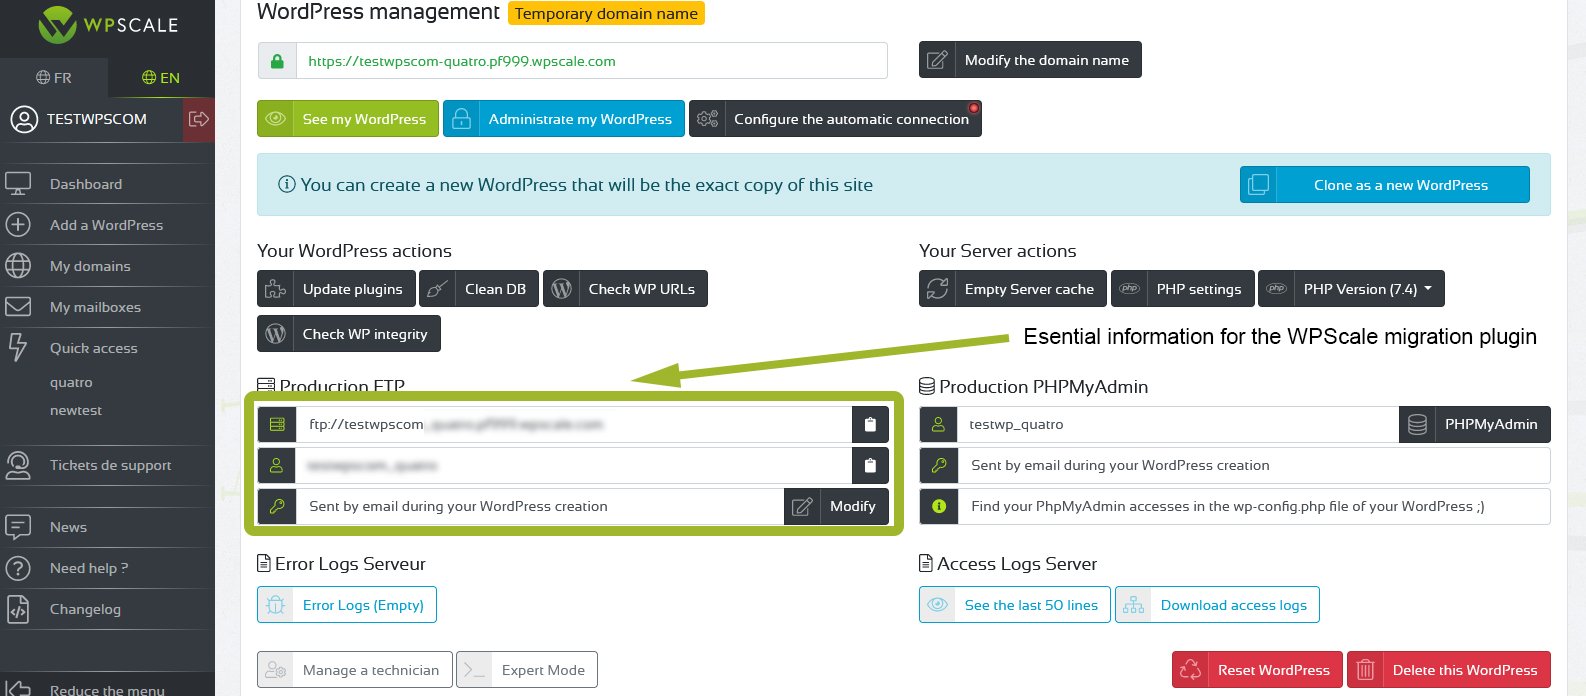
As soon as your FTP login information is retrieved, as well as the URL of your site, all that remains is to configure the plugin.
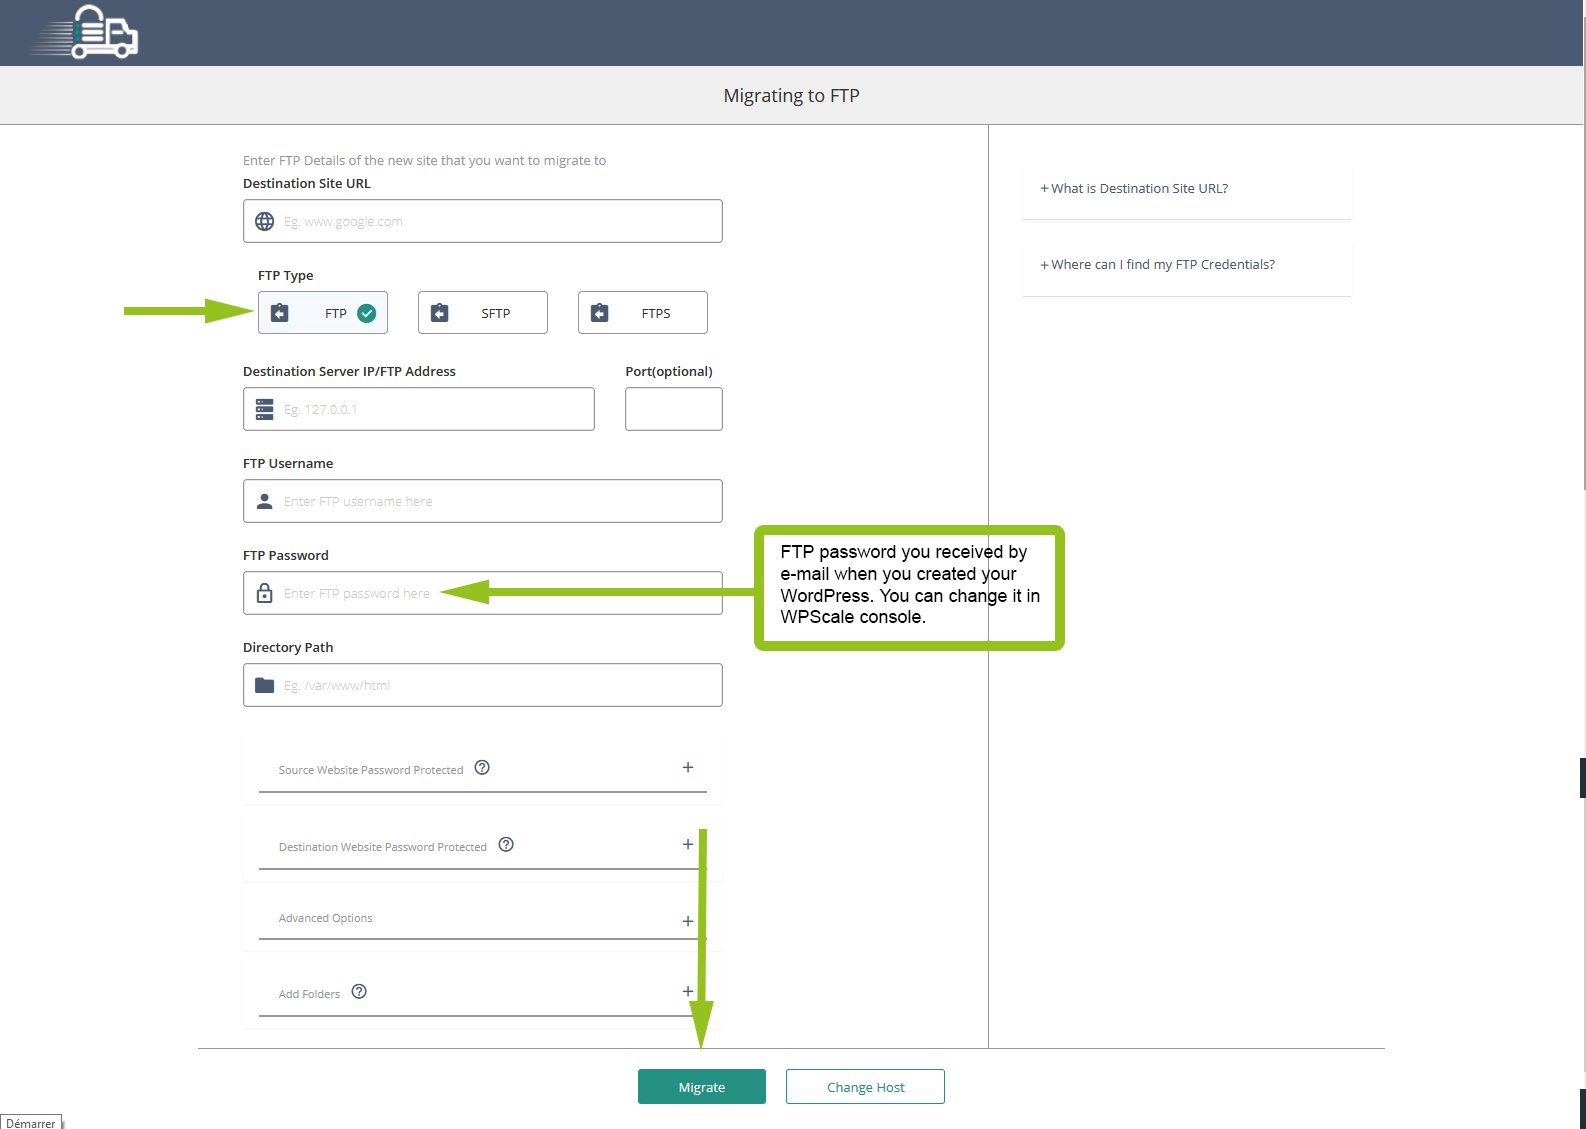
Once you’ve filled in the information and clicked the "Migrate" button, you’ll be redirected to the BlogVault site. All you have to do is wait until the process is complete.
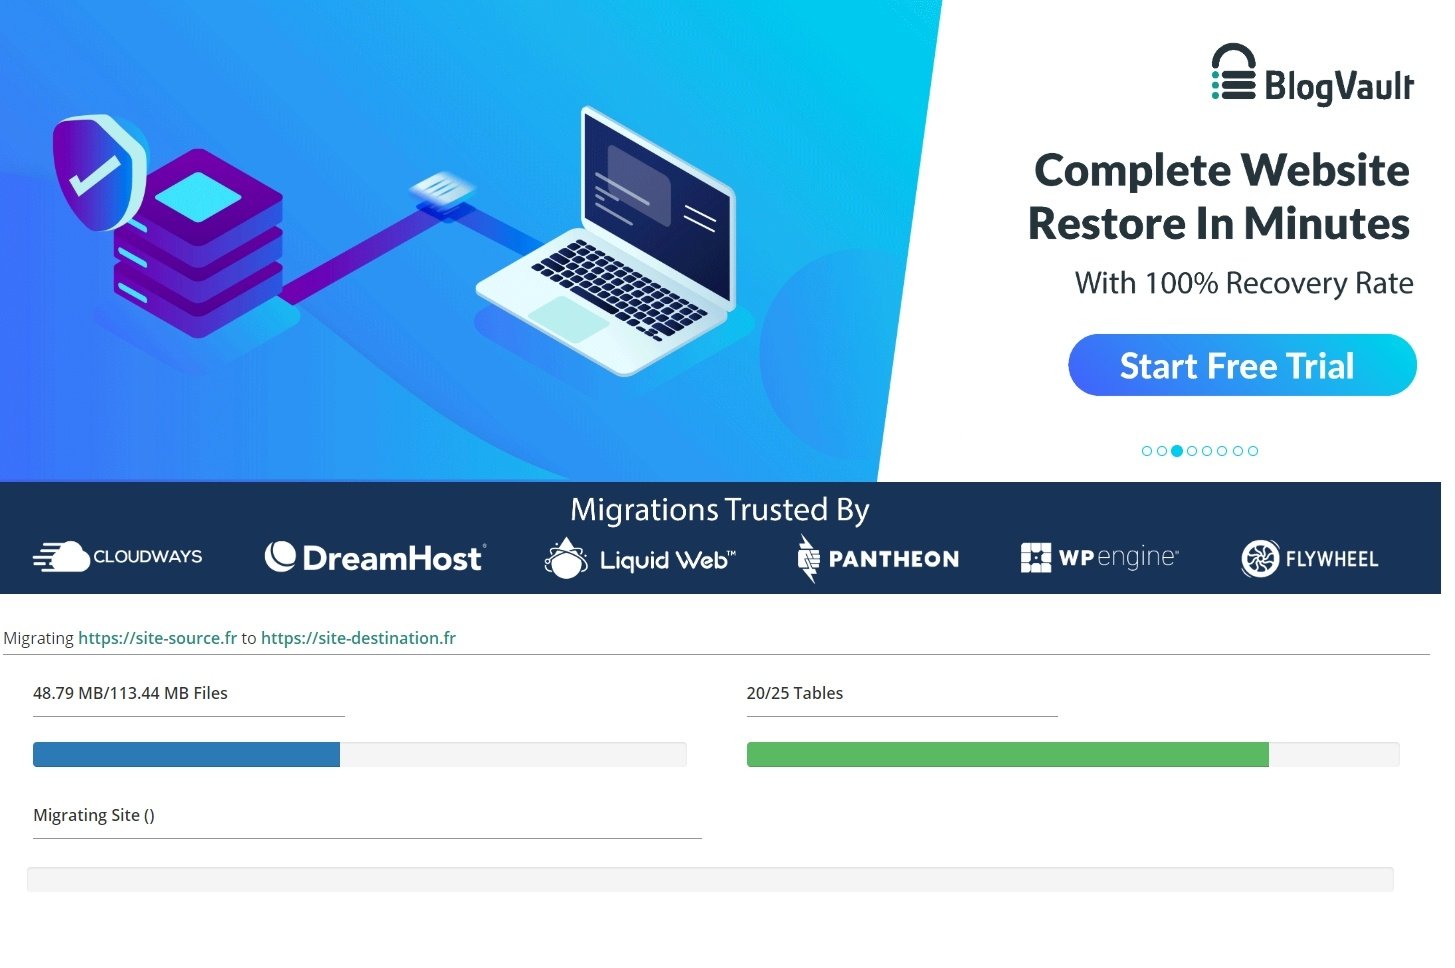
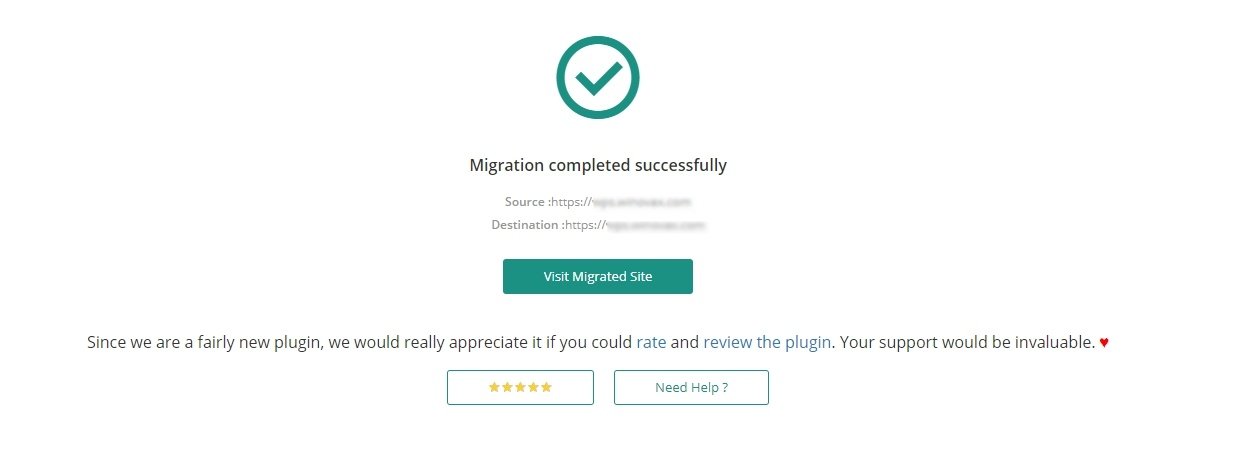
As soon as migration is complete, the link to visit the freshly migrated site is available on the BlogVault page.
If you need to, you can put your WPScale site in "no index" (via Settings >> Read >> Ask search engines not to index this site). You can allow search engines to index your site again once the transfer and DNS change are effective.
That's it - it's done ;)
However, if you don’t feel comfortable with this procedure, we can take care of it via our offer : Moving WordPress.