
What is the WebP image format ?
WebP is a raster image format developed and made available to the public by Google. The Webp format lets you compress your images while supporting transparency and animations (GIF).
Google presents it as better adapted than previous compressors to today's processors and especially to the pixel densities of today's screens (110 to 240 ppi).
Moreover, still according to Google (in 2013), 60% of the bytes transmitted on the web are images, and WebP would provide 30% to 80% space reduction compared to JPEG and PNG.
WebP support in WordPress 5.8
Since WordPress 5.8, WebP image format is supported by WordPress. Simply upload your images to your media library and include them in your content.
Since the WebP format is now compatible with WordPress, there is no need to install a third-party extension to upload WebP images to WordPress.
Note that although you can now upload your WebP images to WordPress using the media library, WordPress does not support automatic conversion of images to WebP format. To enable this feature on your website, you will need a WordPress WebP extension, such as "Optimus".
How to configure the Optimus plugin ?
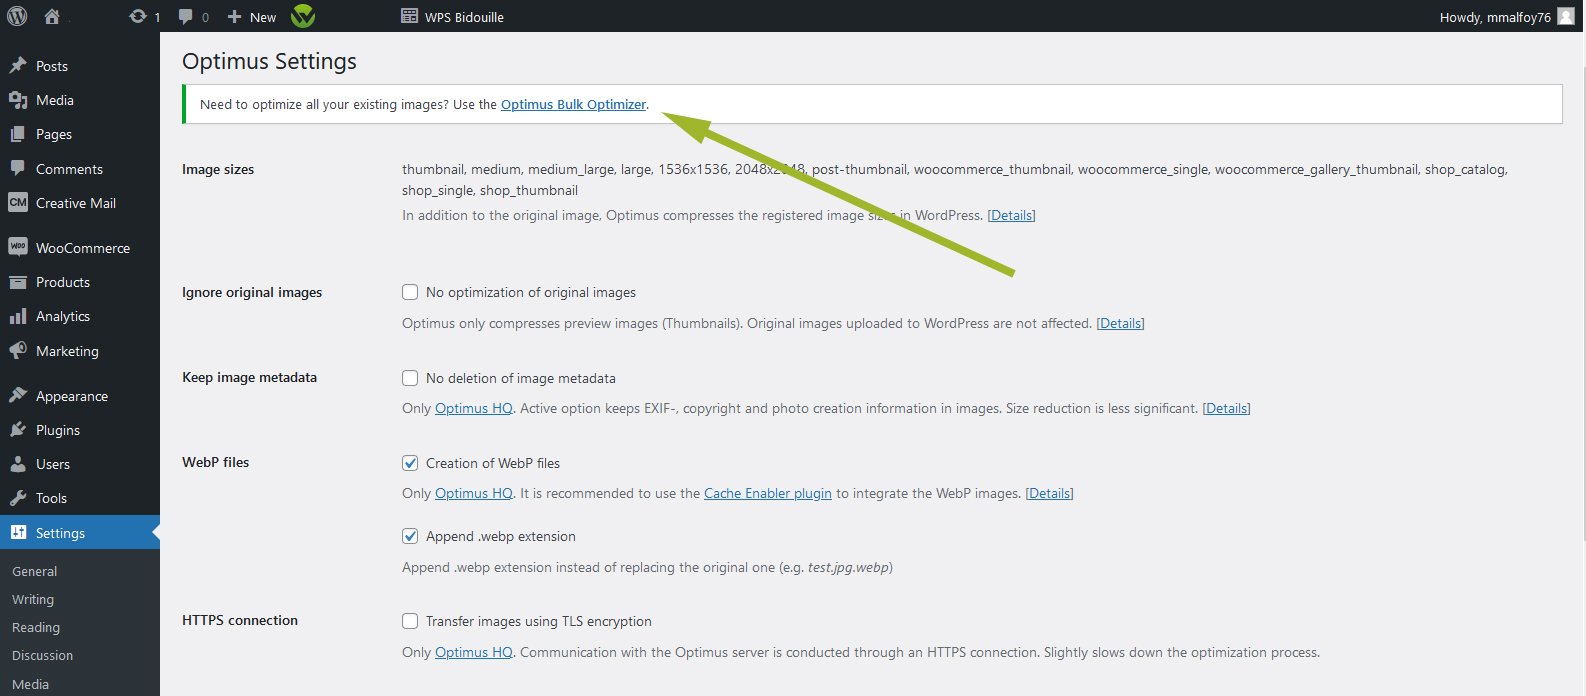
Once the plugin is activated, go to => Settings >> Optimus then check the boxes "Create WebP files" then "Append .webp plugin".
Start image optimization by clicking on the link "Optimus Bulk Optimizer" then click on the button "Optimize all images".
The image compression process may take more or less time, depending on the number of images to be optimized.
When you're done, purge all your caches.
How to check that the images are in WebP format ?
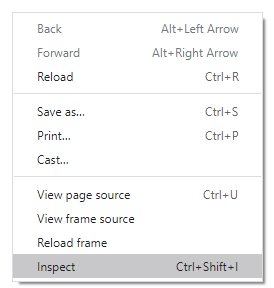
In your browser, on the page of your site, open the contextual menu (or right click on the mouse or then click on "Inspect"):
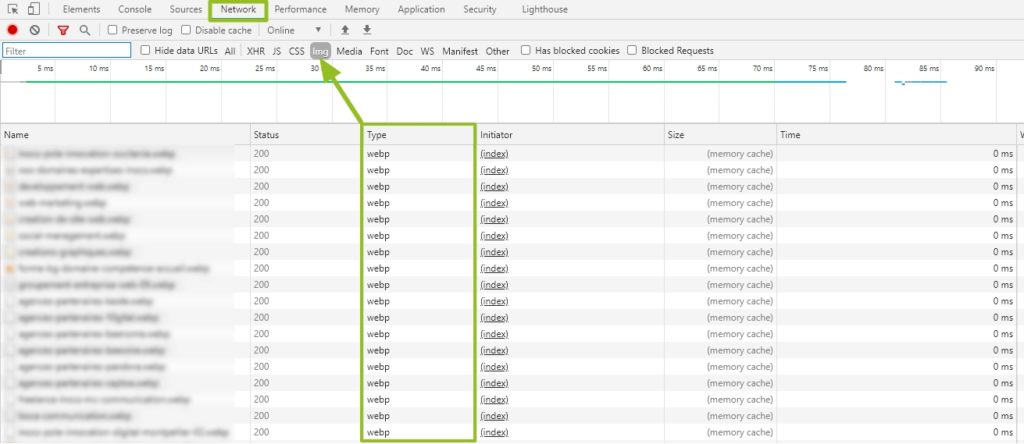
Depending on the browser you’re using, click on the "Network" tab then on "Img" or "Image", locate the "Type" column, and if webp are displayed, it means it’s worked.
If, however, you don't see any change, check the presence of the webp files on the FTP. If there are no webp files, you’ll have to regenerate the image thumbnails. For this, you can install/activate the "Regenerate Thumbnails" plugin. In the WordPress administration, in => Tools >> then click the button to regenerate all images. The duration of the process varies, depending on the number of images to be regenerated, but you should see webp files on the FTP.