
To move your WordPress site from another host to WPScale, you can either use the WordPress export function (via tools>>Export/Import) or follow the simplified procedure below using the Migrate Guru plugin (recommended).

- The first step is to add a WordPress from your WPScale console.
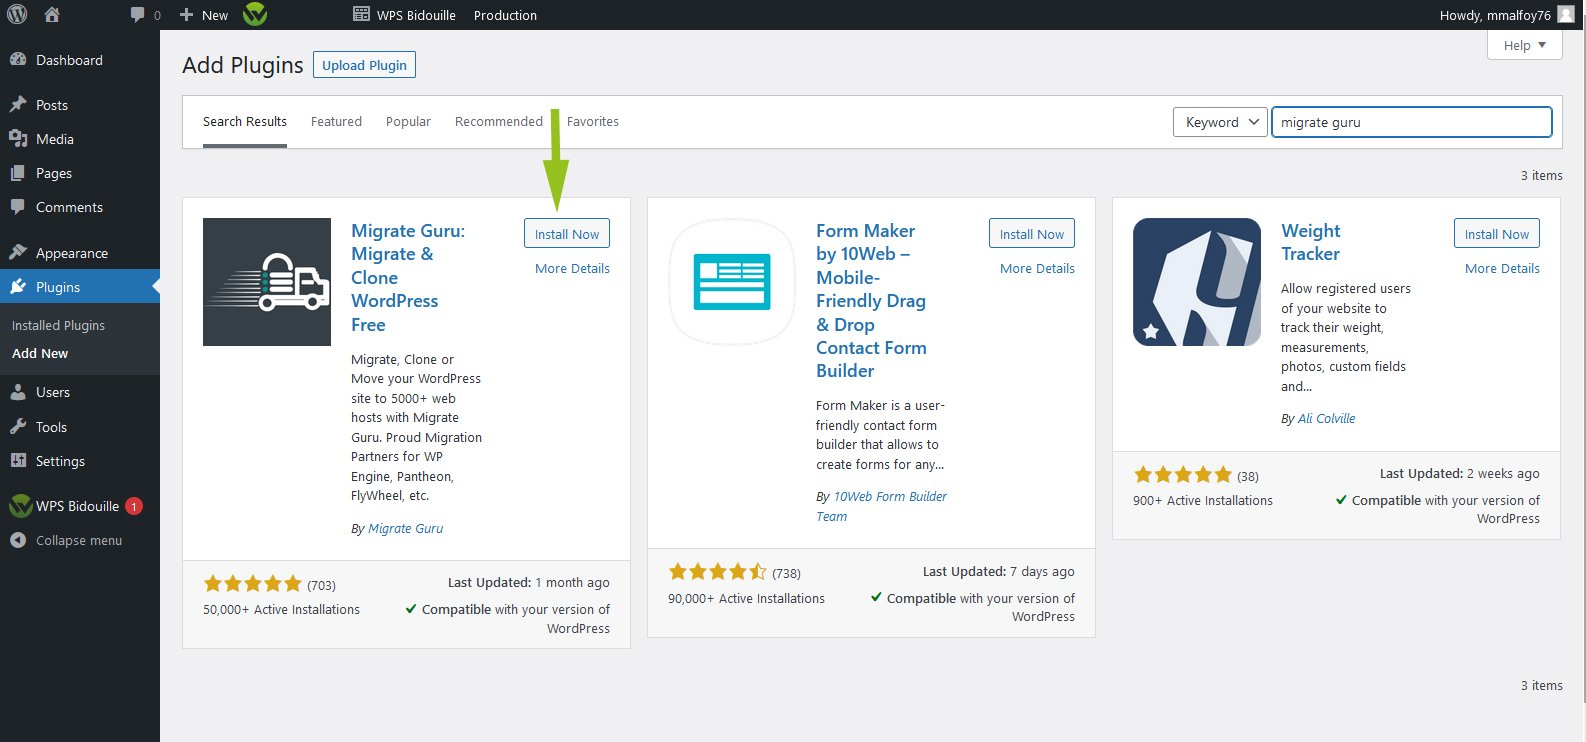
- Then go to the WordPress to be moved and install/activate the Migrate Guru plugin directly from your WordPress Plugins>>Add then search for "Migrate Guru".
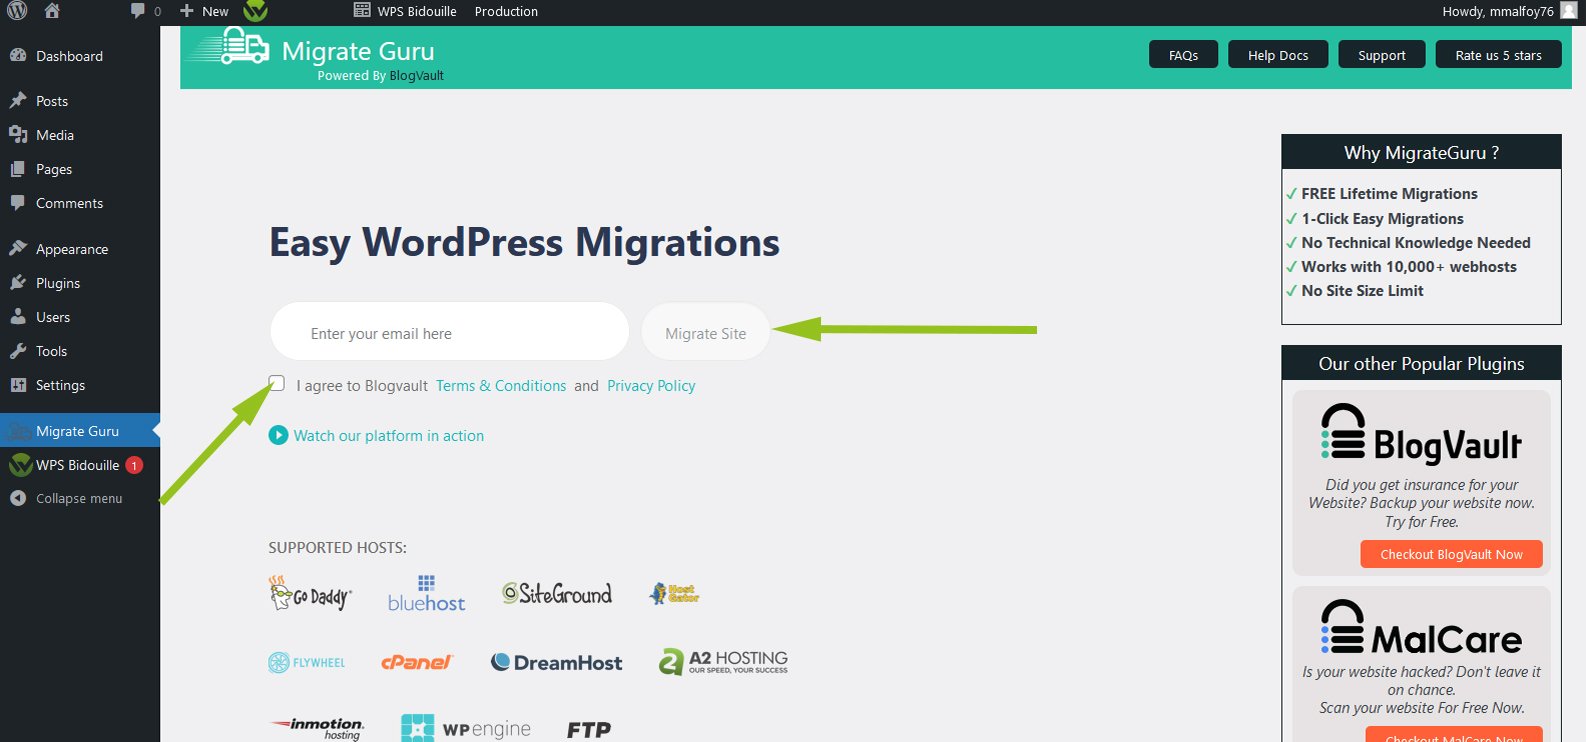
Launch Migrate Guru and fill in an email address, then tick the box "I agree to Blogvault Terms & Conditions and Privacy Policy".
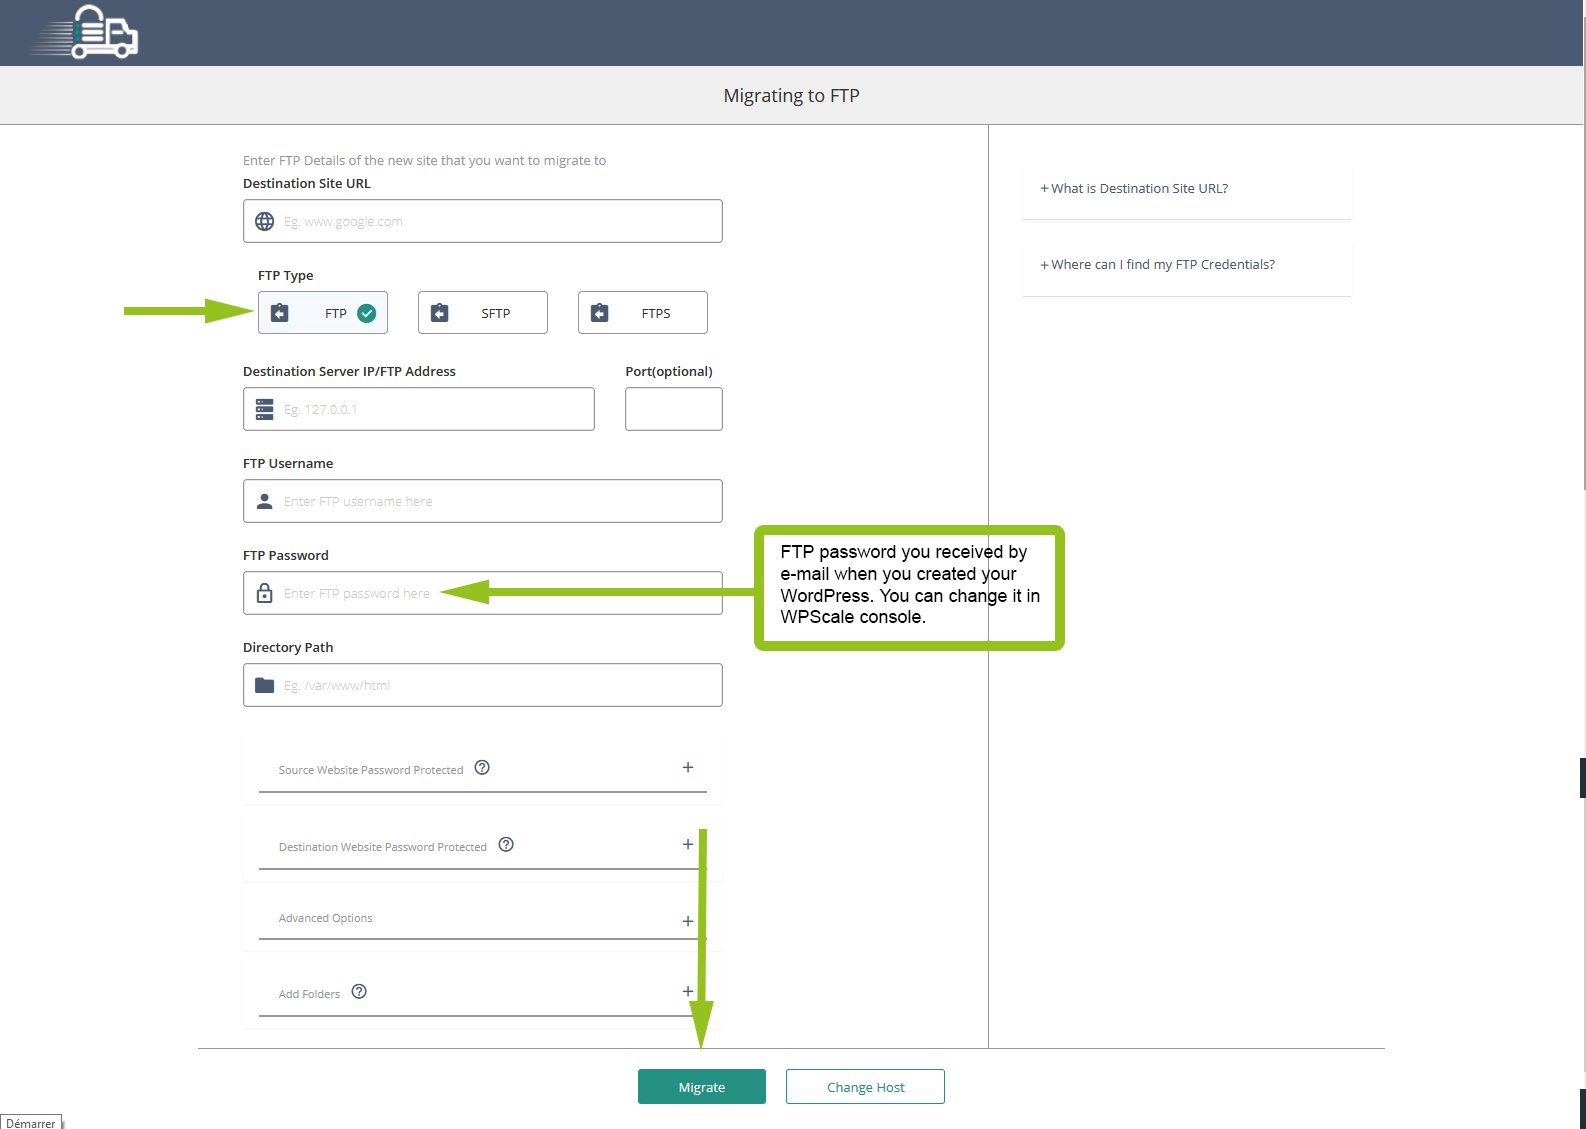
Choose the FTP method :

As shown in green, fill in the FTP information of the site that will host the data of the site to be migrated, then click on the green "Migrate" button. You can get all this FTP information by email when you create your WordPress or from your WPScale console. You can also change the FTP password from your WPScale console if you’ve lost it.
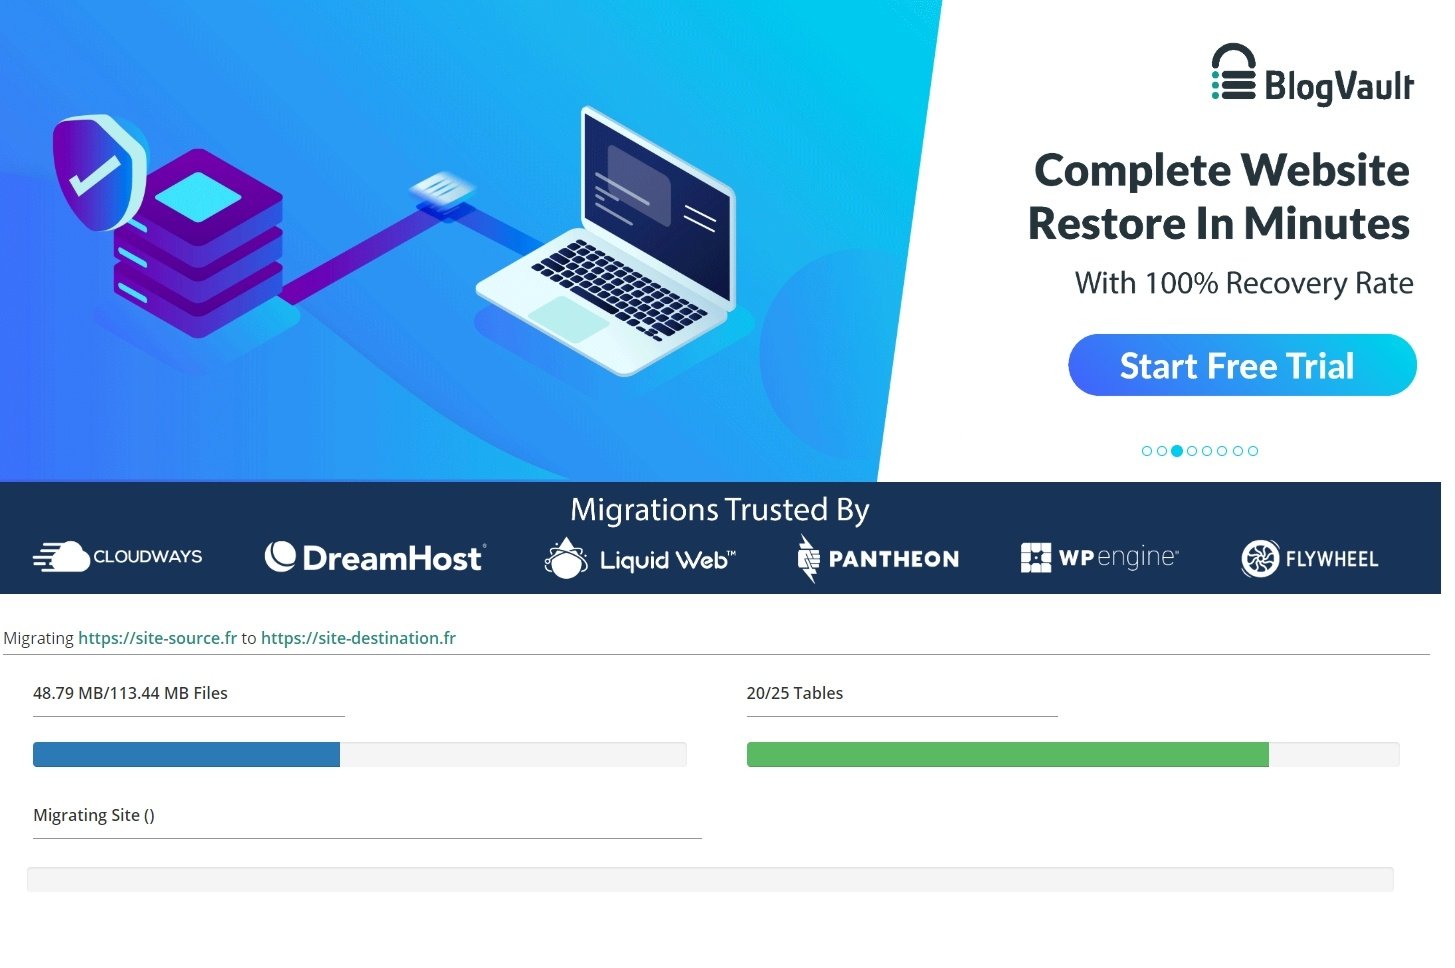
Migration begins...
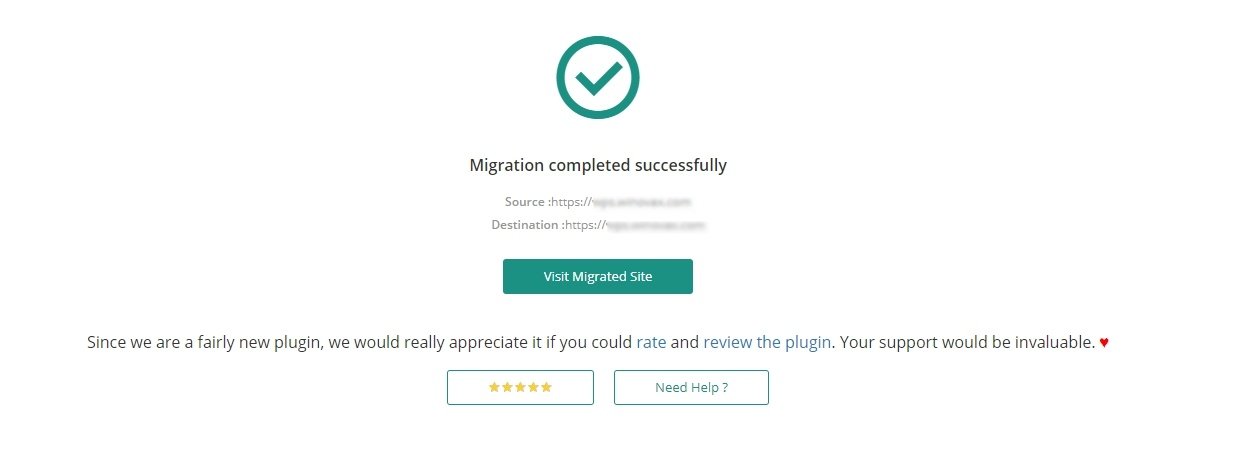
That's it, migration is complete. Click on the green "Visit Migrated Site" button, and you’ll be redirected to the freshly migrated site.
If, after migration, you’re redirected to the old site (source site), it means that you have to update your URLs in your database via the SRDB script or via expert mode (WP-CLI) from your WPScale console. Here’s the documentation to perform this operation : https://www.wpscale.com/docs/console-wpscale/wpscale-expert-mode-manage-your-wordpress-with-wp-cli-and-git/.
- You now have to remove all unauthorized plugins on WPScale. They’re marked in red in Plugins>>Installed plugins.
- Complete this transfer process by activating the following 3 plugins: Block Bad Queries, Plugin Security Scanner and WPS Hide Login. These will improve the performance and security of your WordPress.
- For the WPS Hide Login plugin, remember to declare your login word (default login) via your WordPress >> Settings >> General (at the bottom of the page).
- Finally, after checking that your copy is correct, all you have to do now is make your domain name point to the IP of WPScale by following the tutorial : https://www.wpscale.com/docs/your-first-steps-with-wpscale/dns-change/.
While this transition is set, remember to put your WPScale site in "no index" (via Settings >> Reading >> Ask search engines not to index this site). You’ll be able to authorize search engines again once the transfer and DNS change are effective. That's it ;)
However, if you’re not comfortable with this procedure, we can take care of it via our offer : Moving WordPress.