
WPScale offers a CDN option for its customers. So here’s the tutorial to set it up.
- With a 5 or 10 WordPress subscription, the CDN is included in your package.
- If you have a 1 or 3 WordPress subscription, you can add the CDN option by clicking here.
Setting up the CDN on your WordPress
Send us the URL of the site(s) to be placed on the CDN via the form on the WPScale support page specifying your WPScale login and the URLs of the sites. We will then set up a "Pull" zone for your site and give you the address of the URL zone to be implemented.
To run a CDN on WordPress, you need to use a plugin such as W3 Total Cache or WP Rocket.
Implementation with W3 Total Cache:
This article shows you how to integrate our CDN in WordPress with the W3 Total Cache plugin:
- Install the W3 Total Cache plugin
- Go to the Performance tab (left side menu) and click on "General settings"
- Scroll down to the CDN section
- Check Enable and select Generic Mirror from "CDN type"
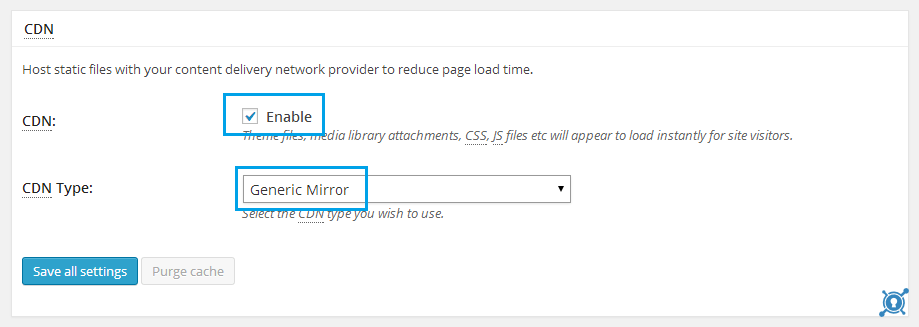
- Click on "Save all settings"
- In the side menu under Performance or in the horizontal menu at the top of the page, click CDN
- 4. Scroll down to the Configuration section and enter the URL field that you received from WPScale support (for example lorem-1af.kxcdn.com)
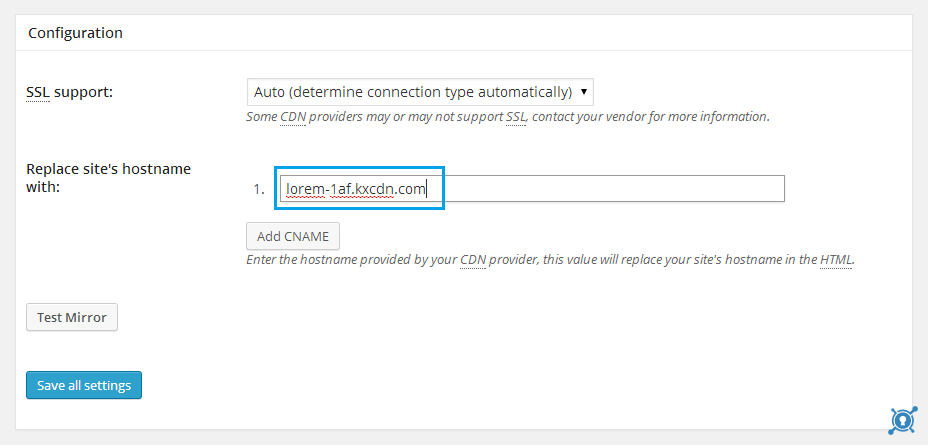
- Click on "Save all settings"
Setting up with WP Rocket:
This tutorial shows how to install the CDN with WP Rocket
-
- Go to WP Rocket settings
- In the CDN tab, check the box "Enable Content Delivery Network"
- Replace the hostname of the site with the one you received from WPScale support
- Limit the use of the CDN to images only for better performance
- Save changes