
The WPScale solution runs on the NGINX server cache. This is an HTTPS cache server, deployed as a reverse proxy between application servers and clients, allowing the former to offload by caching their data, according to rules defined by the system administrator and site developers, to serve requests faster, while lightening the load on the servers.
The NGINX cache lets you cache your pages/articles, thus accelerating their display. In most cases, the NGINX cache will run correctly, but sometimes it refuses to cache. Indeed, the Nginx cache is very obedient, so if one of your plugins or even your theme gives it a "no cache" instruction, then it won't execute !
How to check that the NGINX cache is functional on your site ?
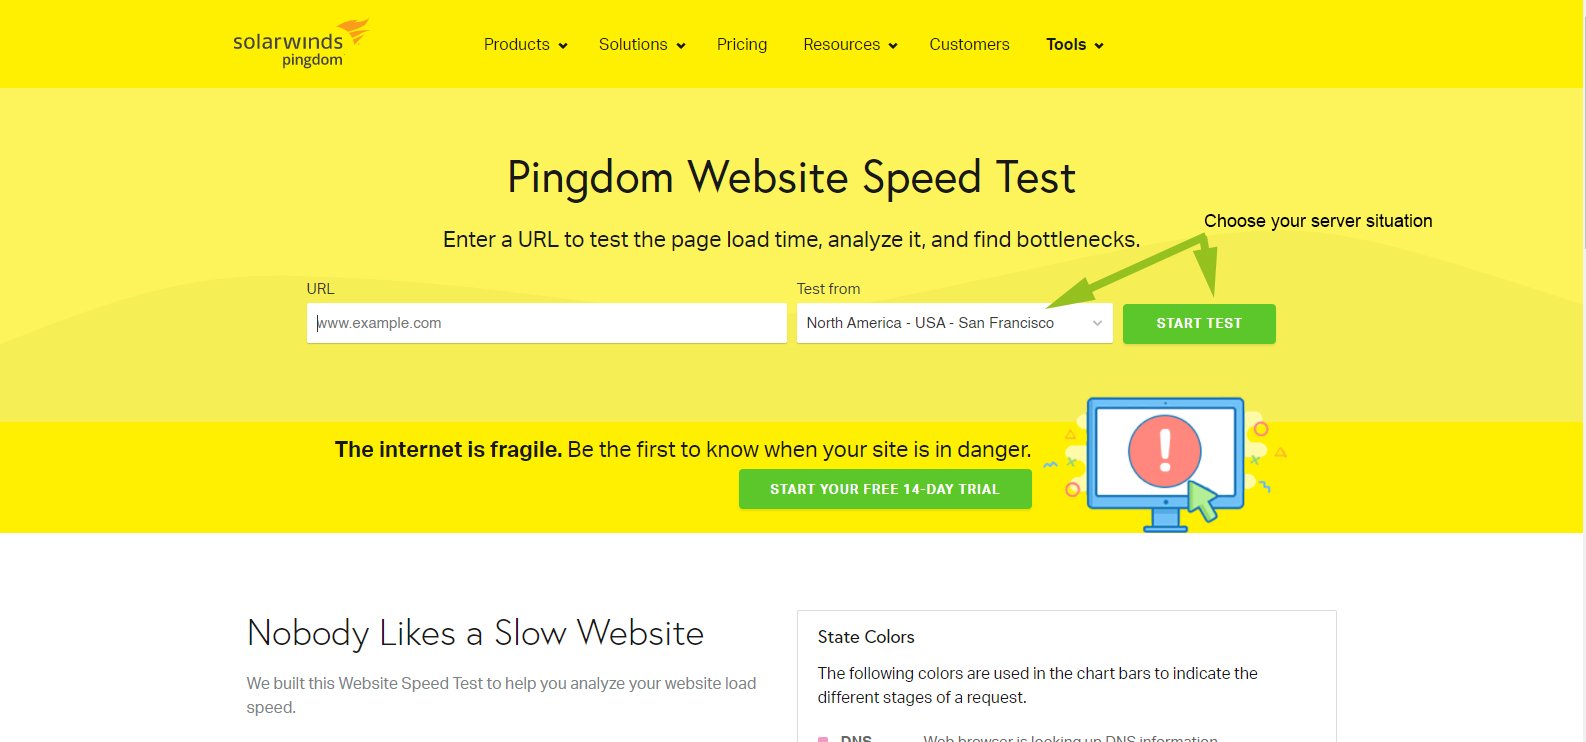
The first thing to do is to check that your site is cached. To do this, we use a very simple tool : https://tools.pingdom.com.
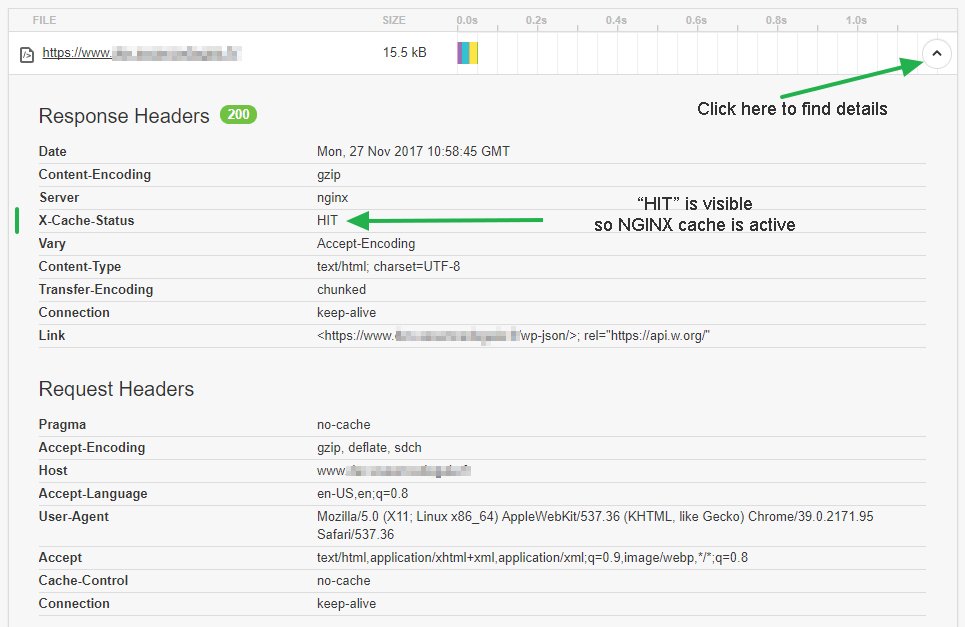
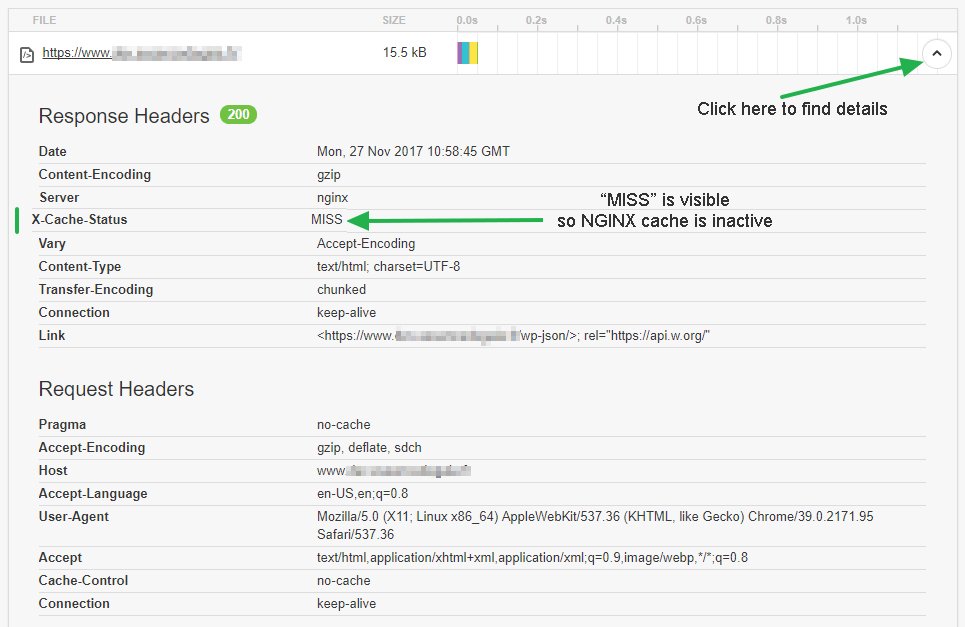
If your site is in NGINX cache, then you’ll see "HIT" appear, and "MISS" if it isn’t !
The Pingdom Tools tool, which also gives you more information about the performance of your WordPress.
Go to http://tools.pingdom.com/fpt/, enter the URL of your site then click on the "Settings" button and choose a server in Europe (Amsterdam or Stockholm), then run the test by clicking on the green "Test Now" button.
The NGINX cache is active if...
The NGINX cache is active if you see the following information X-Cache-Status in the analysis details as below:
The NGINX cache is NOT active if...
The loading time is too long and if on the details of the analysis you don’t see the information X-Cache-Status at all or if you see it as in the example below:
Activate the NGINX cache if it isn’t active ?
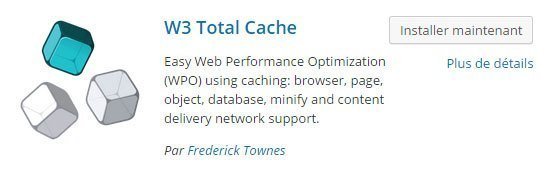
The simplest solution is to use a disk cache plugin that will force this caching. You can do it with 2 plugins, W3 Total Cache (free) and WP-Rocket (premium).
Attention: if you always use a temporary WPScale URL rather than your domain name, the NGINX cache isn’t activated on it in order not to disturb your development and implementation of the WordPress site before the final checking of the domain name.
Instructions for use with W3 Total Cache :
In your WordPress menu, go to Plugins>>Add and search for W3 Total Cache, install and enable it.
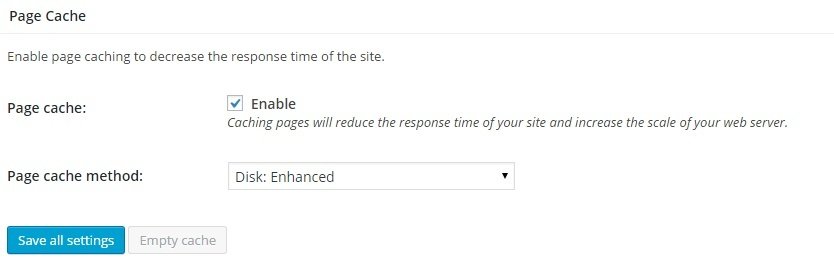
Activate Page Cache:
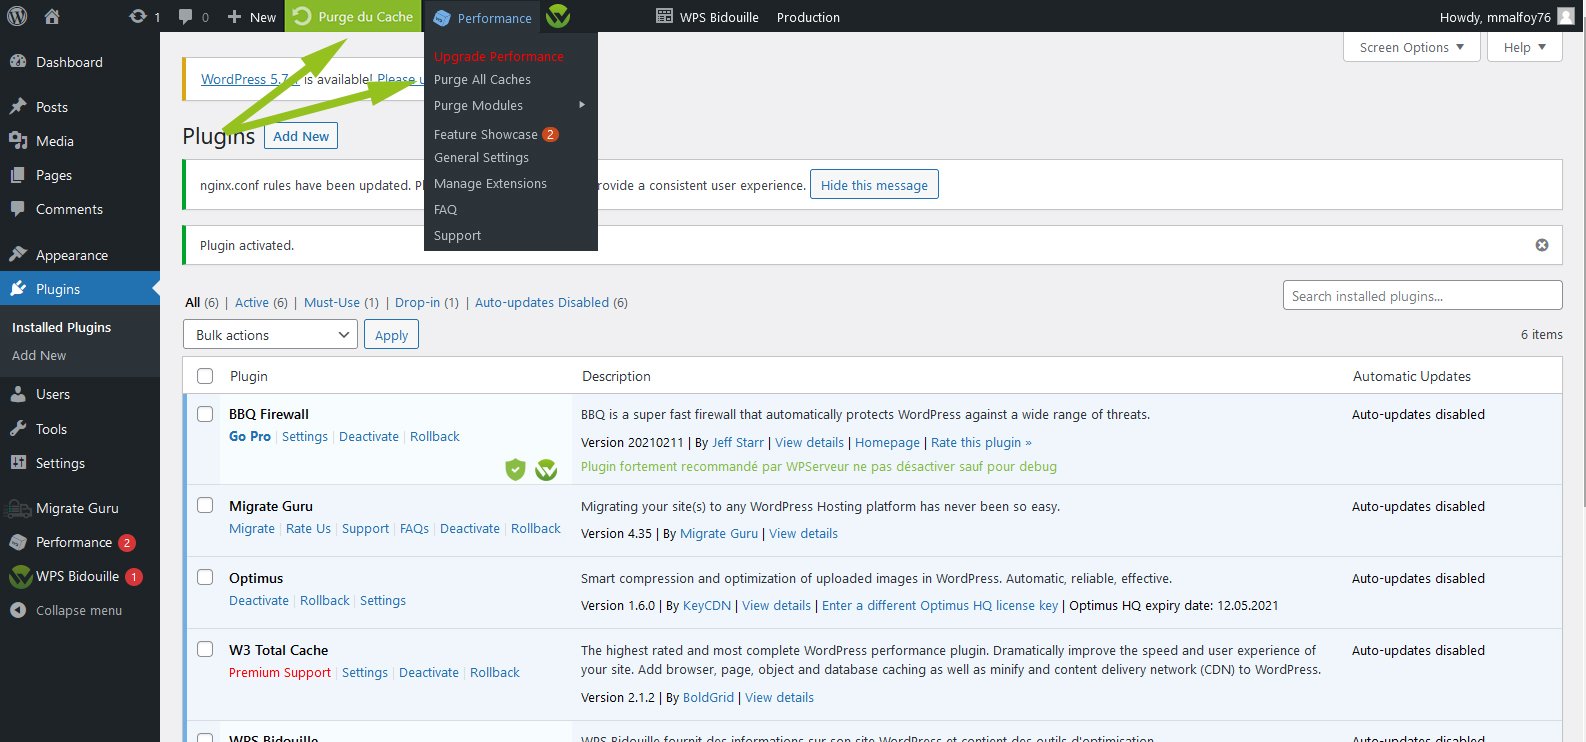
Once the plugin is installed, you have a new menu in your WordPress named "Performance", click on Performance>>General settings and fill in the options as follows.
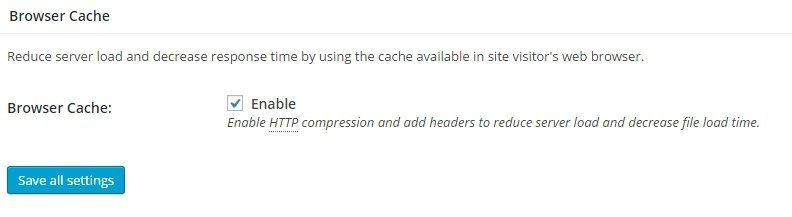
Activate Browser Cache:
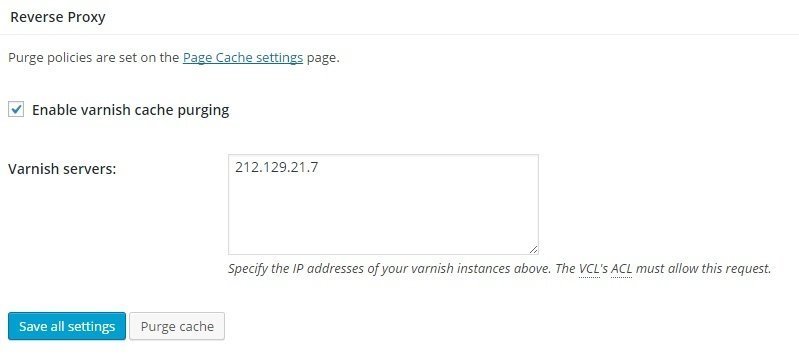
Activate Reverse Proxy (by entering the NGINX IP) : This is the IP of your cache [display-ip-console].
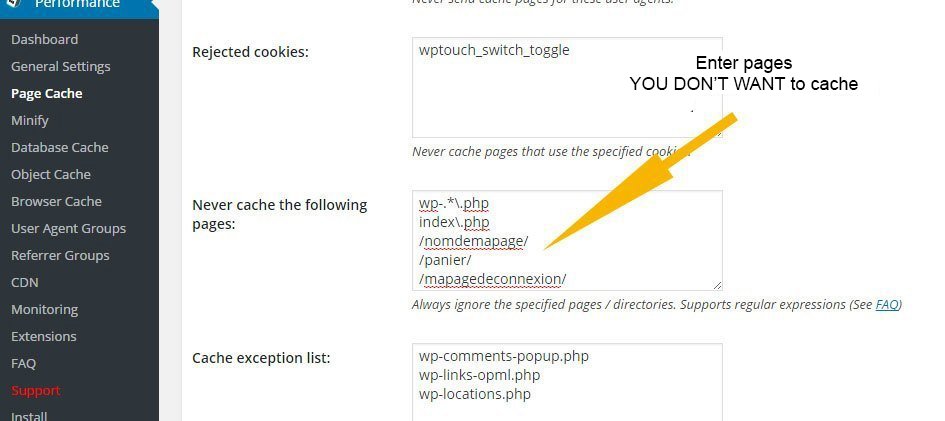
In the Performance>>Page Cache menu (Enter the pages you don't want to cache) :
Save with the "Save all settings" button, then empty all caches by clicking on "Purge All Caches" and finally purge the NGINX cache:
WARNING: These are the only settings you need to activate, otherwise you may encounter errors !
The operation is complete, just retest your site with Pingdom Tools (feel free to do it twice so that the NGINX cache can load) and check that your site finally benefits from NGINX cache.
If you encounter difficulties, don’t hesitate to ask us for advice on WPScale support or directly via chat ;)
Instructions for use with WP Rocket:
If you already have a WP Rocket licence, you just have to install the latest version (be sure to disable any other cache plugin first), then complete the following settings:
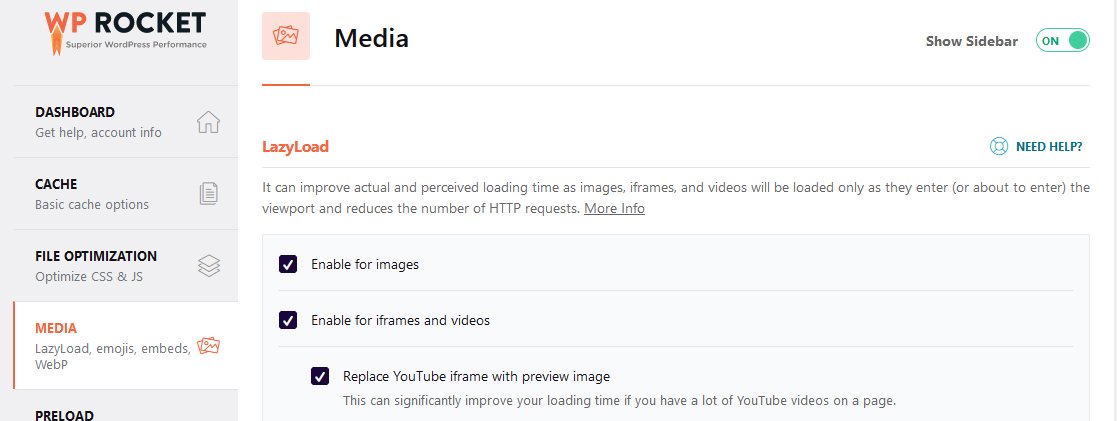
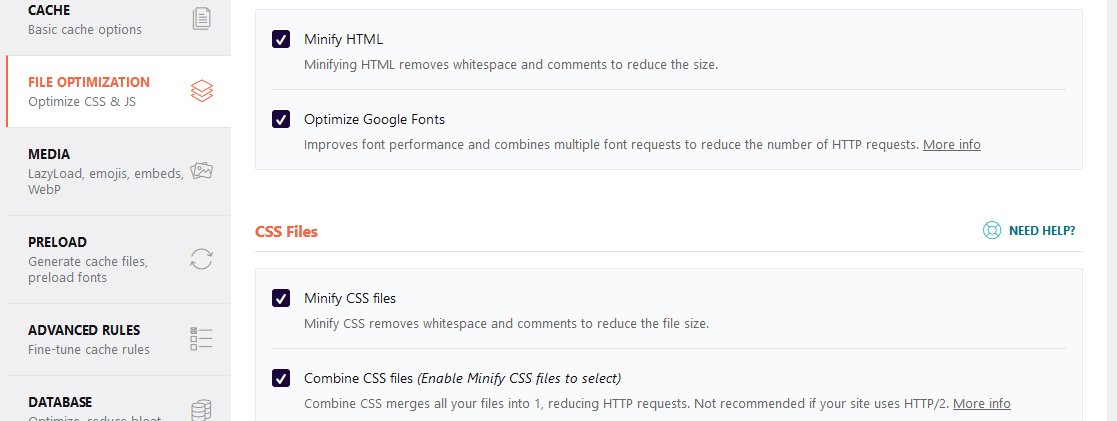
Activate the following options: LazyLoad, HTML optimization and Google Fonts. The options CSS and JS can sometimes be problematic depending on your theme or plugins, so try them for better performance.
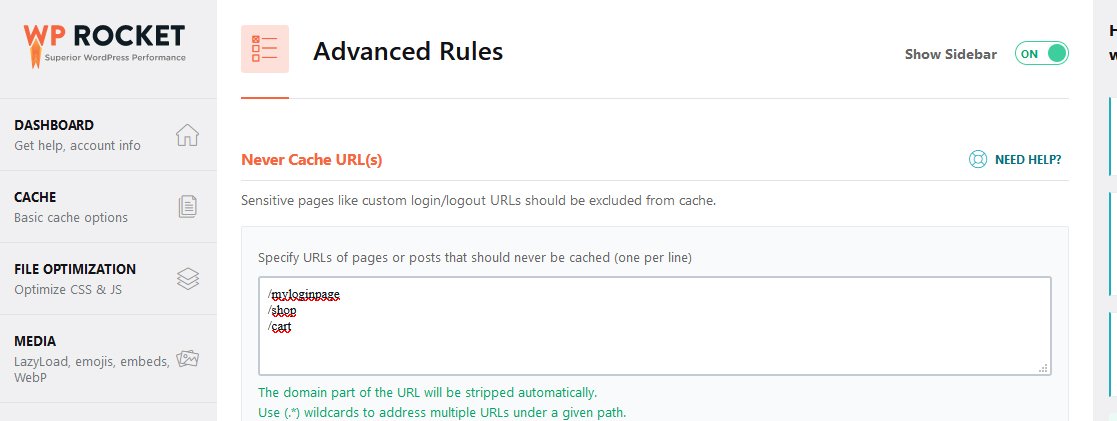
In the advanced options of WP Rocket, don't forget to add the pages you never want to cache. By default, the "basket" and "order" pages are automatically excluded from the cache for WooCommerce, Easy Digital Download, iThemes Exchange, Jigoshop & WP-Shop.
If you use our plugin WPS Hide Login, don't forget to specify it in the pages to exclude from the cache.
The operation is complete, just retest your site with Pingdom Tools (feel free to do it twice so that the NGINX cache can load) and check that your site finally benefits from the NGINX cache.
If you encounter difficulties, don’t hesitate to ask us for advice on https://www.wpscale.com/support-wpscale/ or directly via chat ;)