Clones are an identical copy of your WordPress. When you click on the button
"Create a clone now", a script is launched and copies your database as well as all your content (plugins, themes, etc.) on a new space.
Note that we add instructions in the wp-config.php and a
mu-plugin on the clone so you don't duplicate media from your site in production on the clone. Image display is still functional on the clone.
In case of issues in displaying the resources and media contained in the clone's uploads folder, it’s best to use the
"Clone as a new WordPress” feature.
You only get one clone per WordPress. If you wish to create a new clone, you first need to delete the existing clone by clicking on the red button "Delete clone" at the bottom right.
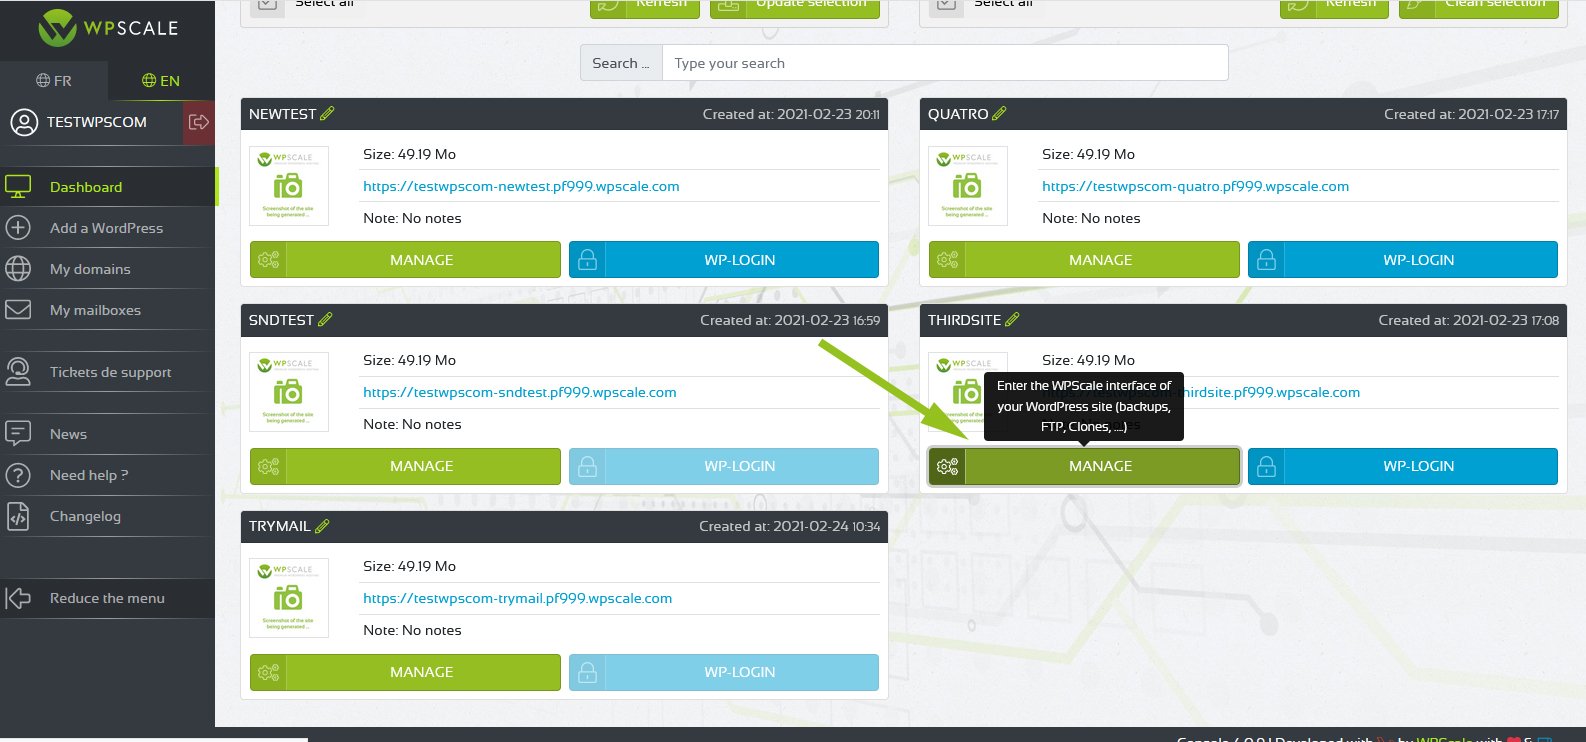
First of all, go to your console (go to the "
my account" page to access it by clicking on the green button), and click on the button to manage the WordPress concerned.
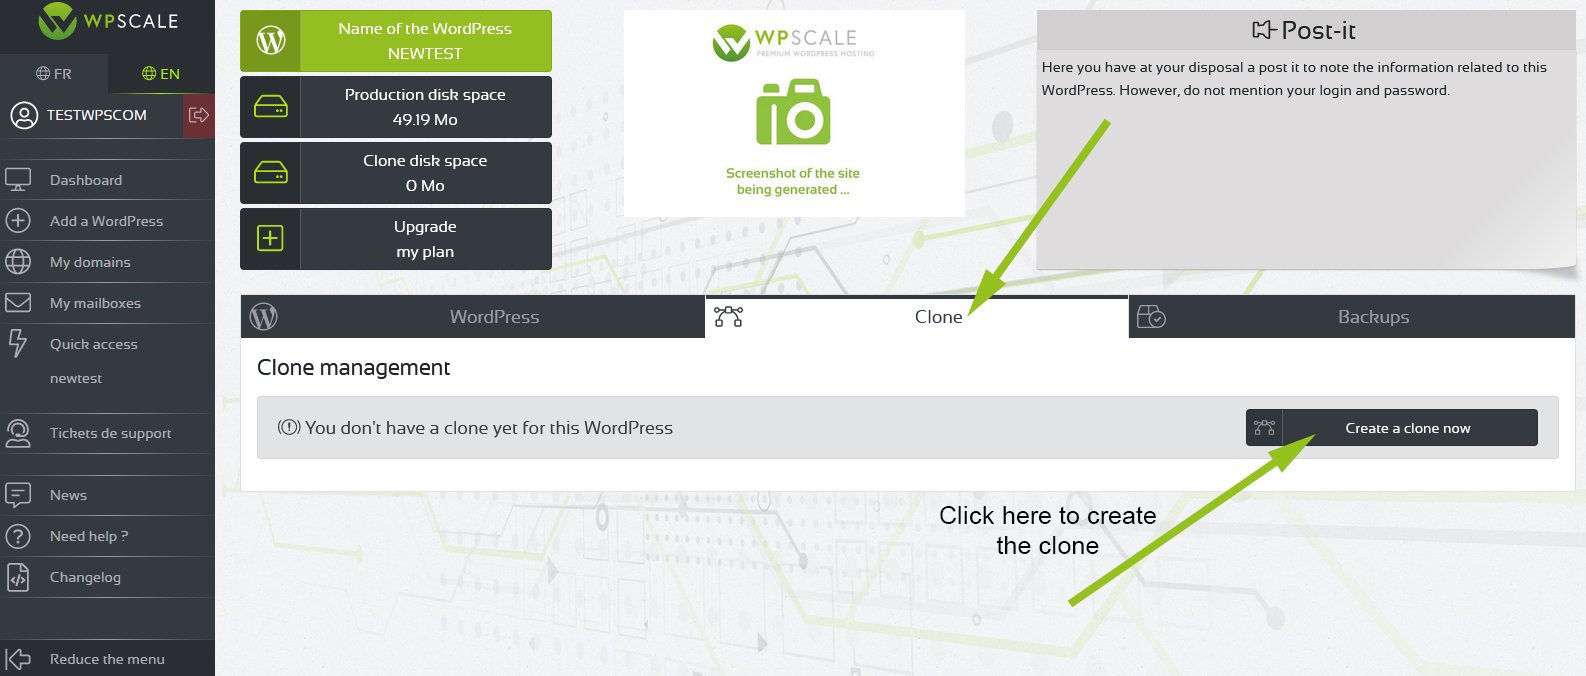
Then, to clone this WordPress, go to the second tab, and click on the "
Create a clone now" button to start the copy process.
Cloning begins:
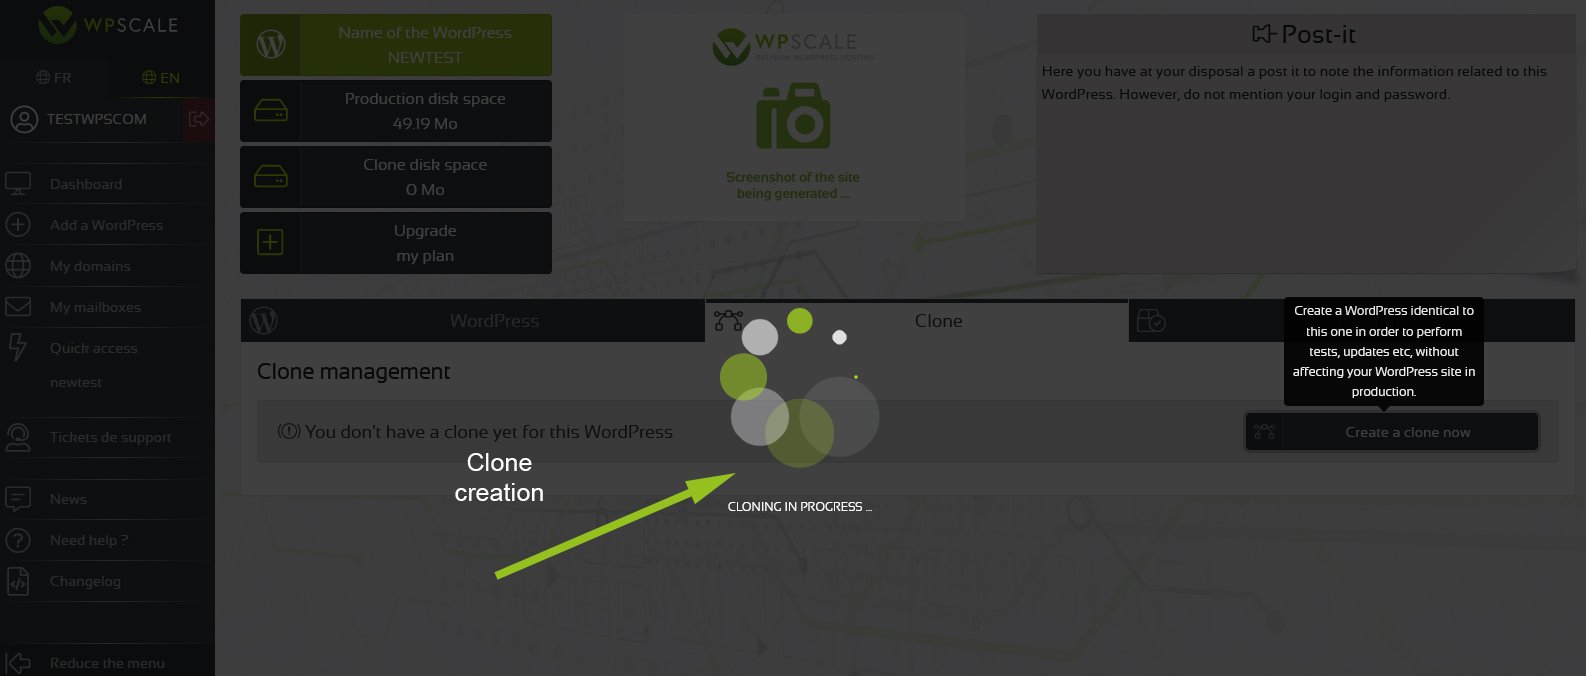
The cloning time will obviously depend on the size of your WordPress.
Indeed, cloning will take longer for a WordPress site of 300 posts than for a newly installed WordPress with very little content. Please wait until the cloning process is complete.
Once cloning is complete, go to the
CLONE tab. You’ll then find the clone of the WordPress you’re currently managing.
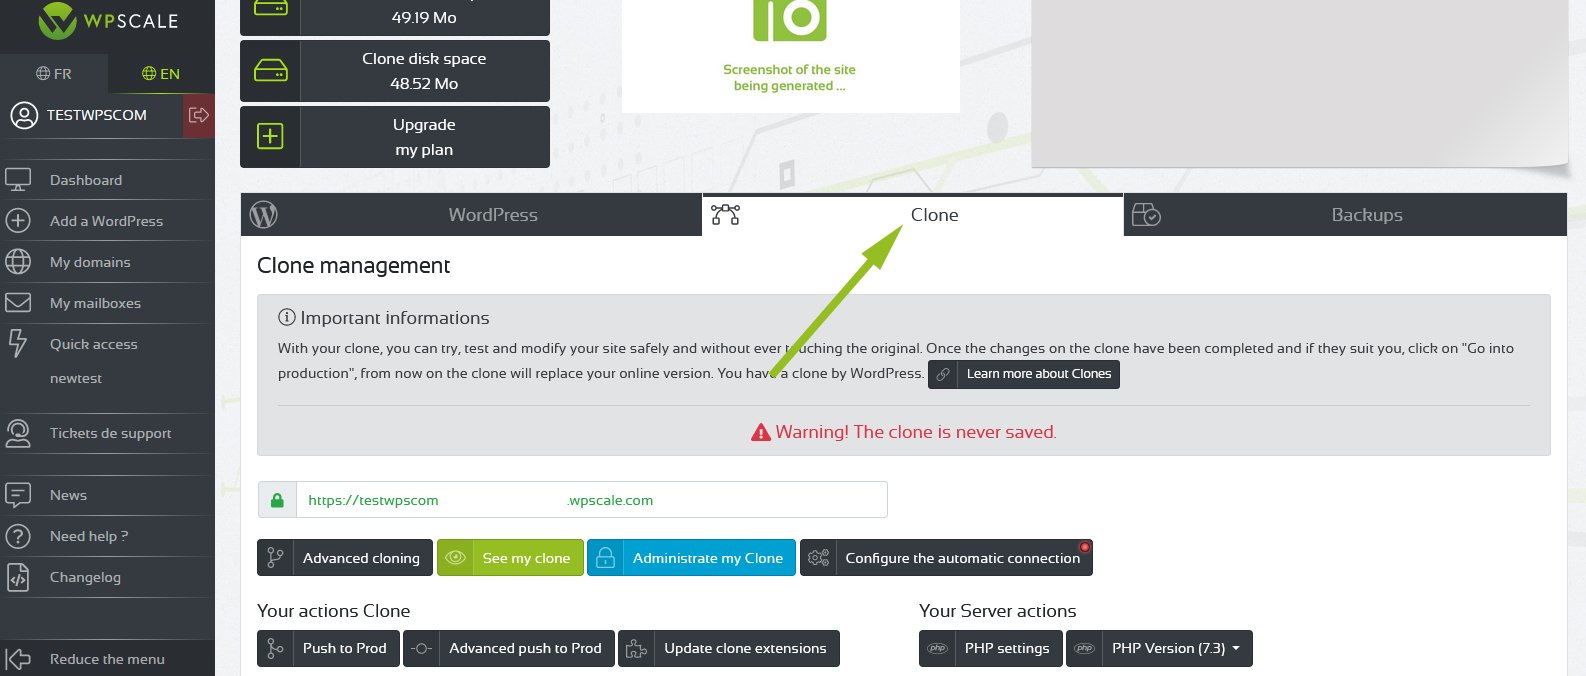
The available options are as follows:
- See my clone: Click to access your clone
- Go to clone admin: Click to access your clone's admin
- Switch to production: Apply all changes to your production site
- Switching to advanced production: Choose which directories and files should be returned to your production site
- Updating the clone plugins: Update all the plugins present on your clone.
- Modify PHP version
- Delete the clone: Delete this clone completely (red button at the bottom of the page)
You will also receive an email summarising all the information (login, password, FTP, PhpMyAdmin...) for your clone. Each time you re-clone your site, you will receive a new email with new FTP and database information.
To log in to your clone, use the same login and password as on your production WordPress.
Thanks to this clone, you can make modifications, test new plugins, modify your content, without ever altering the original !
If you’re happy with the changes you made to your clone and would like to apply them to your production WordPress, simply click "Go to Production". The WPScale (WPS) console will take care of everything !
Be careful, though: if you’ve made changes on your PROD site after cloning, switching the Clone to production will overwrite these changes, so the Advanced Production Switching tool can be useful in this case.
PLEASE NOTE: If you use a cache plugin (w3 total cache or wp rocket), remember to disable it before cloning or putting it into production ! If you use a retweet plugin (old post revival or buffer type), JetPack, don't forget to disable it on your clone.
The clone has no backup, it’s a test tool, so don’t use it as a development tool.
When creating your clone, WPScale automatically adds a Robots.txt file prohibiting search engines from indexing the clone. You can also make sure that the engines do not index this content by going to the Admin of your WordPress clone via Settings>>Play>>Search Engine Visibility and checking "Ask search engines not to index this site".
The clones have no backups; the backups you see below are for the production site !
We recommend you use Duplicator (How to use Duplicator) to save a version from the previous day, so you can use it in case of problems :)
